
- Home
- Painting Tutorials
- Free Painting Lessons
Our Free Painting Lessons Will Show You How...
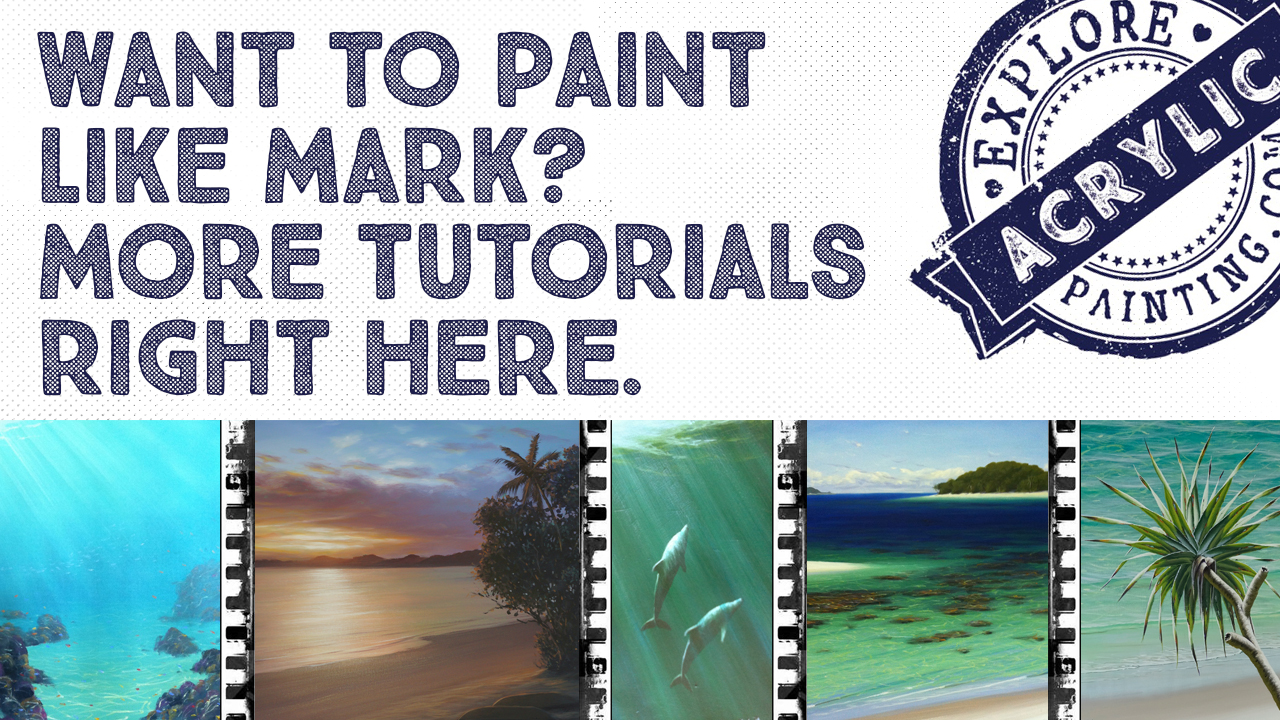
Paint a Beautiful, Light Filled Beach Landscape
With Our Free Painting Lessons!
I did this piece a long time ago as a painting exercise for Artists Palette magazine. While this is an older tutorial, there is still some great information in there - and it's full of free painting lessons for you!
What's that you say, free?? YES. They are free. From start to finish. And FREE! (Too much? hmmm, we thought so too…you get the idea!)
I generally prefer to teach acrylic painting skills and techniques, and hope that you will then take these out into your own world. (Mine's kinda strange). However, we've had a lot of demand for this type of "start to finish" lesson, so we thought we would resurrect it!
So grab yourselves a comfy seat. Read through the tutorial once. Then jump up, inspired, grab what you need, and chuck some paint around!
We hope you enjoy the first in what we hope will be many of our free acrylic painting lessons!
Free Painting Lessons
The Best Seat In The House
Materials Needed
Canvas – Size 70cm x 85cm.
Brushes – Cheap flats - Roymac’s (or other cheap brand of your choice). Sizes, 2, 4,6,8,10,12.
I don’t spend a lot of money on brushes. I use them every day and am very hard on them. I find that the better quality brushes don’t last much longer than the cheapies! Note - the cheapies need to be worn in a little, so all the loose hairs come out before you use them on your painting.
Paint - Atelier Interactive Artists Acrylics:
- French Ultramarine Blue
- Pthalo Blue
- Cadmium Yellow Medium
- Cadmium Yellow Light
- Permanent Alizarine
- Dioxazine Purple
- Burnt Umber
- Forest Green
- Titanium White
- Atelier Retarder Medium
- Atelier Clear Painting Medium (for glazing)
- Atelier Gloss Varnish
For all my paintings I use Artists quality acrylic paints by Chroma Australia, Atelier Interactive and Atelier Free Flow.
Other:
White blackboard chalk
The Plan
I have a soft spot for Pandanus trees. They are for me, the epitome of the North Coast of NSW beaches. I've hidden from the rain and sun under them, slept under them, played with the kids under them, and my paintings of them have paid my mortgage. I love them so much, I thought I'd share them with you as the first of my free painting lessons.
The idea is to create an image, which is convincing from a realist point of view. It should capture the sunny feel of the beach, and the haven that Pandanus trees offer. At the same time I can indulge myself by exaggerating some unexpected colours and aspects of the image.
The bliss in life is found when we take the time to notice tiny wonders that surround us. Most of my paintings are both an attempt to relive these moments; and an opportunity to present flashes of my wonderment to others.
I have taken some digital photos as a rough guide for the painting. I haven’t bothered doing sketches or rough studies because I know this tree and its environs so well. I will do this painting in my studio and plan to let my experience with the scene direct me.
Describing the process of creating the colours for my paintings is not an easy task. Writing this demonstration has emphasised how much of what I do is subconscious (though many who know me would suggest unconscious!).
So many tiny touches of colour go into creating a final colour which is just right, so it would take more space than is available here to accurately describe the process. I am not even sure if I can articulate what is “just right”. I have used the descriptions of colours as a rough approximation, so please bear with my attempts to explain.
The Process

Roughing In
Stage 1
Paying little attention to colours I create a thin, dark mixture of Alizarin, Pthalo Blue and Dioxazine Purple.
With a #12 brush, I rough out the structure of the painting, horizon, branches, shadows etc. When that is complete I throw in the basic colours of the dominant areas and do not concern myself too much about accuracy of colour.
The idea is to gain an overview of the piece, to get a sense of composition and colour values.

Any minor variation from the final colours will pay dividends at a later stage of the process.
I like to have plenty of colour under the final coats. These multiple layers eventually give the image a more natural look.
The fast drying time of acrylic paints tends not to allow colours to be contaminated by, and blended with surrounding areas of paint. The result can be a flat block of colour, with little variation in hue or value, and an unreal feel to the work. Subtle variations in the layers can solve this.

Stage 2
Still using a #12 the next stage of the painting requires a repeat of the previous stage, with more care taken with colour and form. The brush work is more precise. I am still adjusting elements, dropping a branch slightly here, re-defining the major clusters of leaves there.
I don’t like too many white pinholes of the canvas showing, so I feel it is important to get plenty of coverage in the darker areas. I am still using the photo as a reference at this point, but am drifting away from its colours, especially in the darker areas of the tree and the shadows.
Every time I go to the beach I make a mental note for future reference. Sometimes the colours discovered are bordering on unbelievable! I am always surprised at how purples feature heavily in the shaded areas, particularly on the sand.
Stage 3
Before I begin the sky, I paint in the famous Lennox Point using Pthalo Blue, a small amount of Dioxazine purple, some Forest Green and White (to kill the strength of the colour). This colour covers the Point in all the shaded areas. Using a #4 I try to place it reasonably accurately. Cadmium Yellow, a hint of Alizarin and some white makes the colour of the grassed area that covers the headland. Following this, a slightly redder version is dragged over in areas to simulate the differing tones of the different grasses.

The following sequence needs to be done quickly so on dry or hot days I add retarder medium.
I mix Ultramarine Blue, Pthalo Blue and White, and starting at the top with a #6 in the smaller areas, I work down through the sky - adding White and hints of Ultramarine Blue as I go. As I near the horizon, all of the Pthalo Blue has been overpowered.
I add the tiniest hint of Cadmium Yellow to simulate the dust and haze that dirties the sky close to the horizon.
I mix a little Dioxazine Purple and Ultramarine Blue with that dirty sky colour and with the pale purple resulting, I work in the shadows under the clouds that hug the horizon. Now I mix White, the tiniest hint of Alizarin and Cadmium Yellow together, and highlight the upper edges of the clouds using this mix.

Mixing Pthalo and Ultramarine blue, Forest Green, a hint of Alizarin and White, and with a #12, I paint in the body of water staying a little way from the horizon. I add some White and a touch of Ultramarine Blue, painting up to the horizon line and blending downwards, pulling the two slightly different blues together to give atmospheric perspective. I have worked quickly, so am able to pinch the still wet sky and water together without getting a very hard edge.
I now add some White and Cadmium Yellow Light to the mix, and fade downwards, getting paler toward the beach area. A strip of White mixed with Ultramarine Blue and a touch of Dioxazine Purple makes the wet sand on the beach. Dioxazine Purple, Cadmium Yellow Medium and White with a tiny hint of Ultramarine Blue, becomes the damp sand. While this area is still wet I blend into it the almost white of the drier sand. I can now stop and take a breath.

Stage 4
The wave detail is begun by loosely painting in the whiteness of the breaking waves with a #4. I use the edge of the brush to create the lip of the wave and the smaller waves closer to the shore. White defines the surf. A thin mix of Burnt Umber and Pthalo Blue is thinned out until it is mostly Clear Painting Medium. It is gently brushed in at the base of the unbroken part of the wave, making the shadow a wave cast as it breaks. More White is added to some Cadmium Yellow Light and a touch of Pthalo Blue; and brushed along the centre of the face of the wave, creating the illusion of being able to see through the face. This process usually involves some to-ing and fro-ing to get the appearance of transparency.
Another coat of White (pure) over the broken parts of the wave is applied with a sensitive and accurate touch and is used to “clean up” the surf a little. Small flecks of white are also added with a #2 along the wave's face, as highlights to represent the reflection of light. At this point I stand back and evaluate the sky and sea area. It will do for now, but I will have to adjust some colours in small increments using glazes, finally “cleaning up” the whitewash with another coat of white at a later stage.

Developing Further
Now for the dunes and grass.
Titanium White and the barest hints of Cadmium Yellow, Alizarin and Burnt Umber are combined to create the very pale bone colour of the sand. This is brushed on solidly on the beach, but sparingly with a dry brush on the bank, leaving some of the wash of pale green in the grassed area showing through.
A #8 brush is large enough for this purpose. The dark edges along the bank are also repainted.
I have chosen to exaggerate the purple in the shadowed regions because??? (I’m not sure why, I just like it! There is plenty of Dioxazine Purple in the shaded areas of the tree, and I will use much more purple before I have finished. The end result will still be convincing even if the colour looks strange at this stage.)

A dry small brush (#4) loaded sparingly with a thin muted Burnt Umber mix, is now used to scratch erratic lines along the dunes. This simulates the stem systems of the beach grass (apparently a type of Spinifex). The Burnt Umber is now "greened up" by adding Ultramarine Blue, Cadmium Yellow , White and a touch of Pthalo Blue. With a dry #10, this mix is dragged strategically along the Burnt Umber stems to generate the shadowed grass blades. This process is repeated several times, each time with a lighter and more yellow mix, to show the highlights and varying tones that give the grasses life and depth.
There is a creeping plant which grows though the dunes up here. It is perfect because it allows me to introduce some cleaner colour to the dunes, and brings some of the greens which will be quite strong in the Pandanus tree, down into the very large bone area of the beach and dunes.
Painting the creeper is a simple process which involves Forest Green, a touch of Alizarin to warm the colour without dirtying it too much, and some Cadmium Yellow to lighten and brighten. Daubs of the green are applied in bunches with a #2.
After mixing more Cadmium Yellow, additional lighter leaves are painted in, and the green is used in the same way as the Burnt Umber to create the runners. The leaves are painted each time with progressively more Cadmium Yellow, and a final pass is made with White added to the mixture.
Sometimes I may have to with a dry brush, work in some more sand though the thin beach grass. Occasionally I need to re-paint grass or vines in patches until I am satisfied with the result.

At this point the Pandanus tree itself has been neglected, and has been covered in parts by the process of working on other areas. It is now time to re-establish the tree.
At this point I could make the branches any one of dozens of colours, but I want to play with Dioxazine Purple and see what I can get away with. The “heat” of the purple helps bring the foreground forward, and by virtue of this, pushes the background back!
Ultramarine, Dioxazine Purple, a hint of Pthalo Blue, a touch of Burnt Umber and a hint of White are combined to make a colour which almost seems to be contradictory, in that either the purples or blues can predominate depending on your bias. This mix is brushed on solidly with a touch of Painting Medium to allow the #8 brush to flow.

I resist the temptation to leave a hard edge along the branches, so apply the majority of the paint in the centre of the trunk, and use the dryer brush for defining the edges. Sometimes two coats are required to cover the places where the sea or dunes have covered the trunk.
Next a dark mix of variations of Forest Green and Dioxazine Purple, Pthalo Blue and Dioxazine Purple or Ultramarine Blue thrown into the mix, are painted into the leaves - mainly in the upper areas, as the lower branches of Pandanus trees are full of dead or dying leaves. I generally paint the lower leaves in the same way as the upper leaves, except that I add Burnt Umber to the mix.
I then drag the Umber colour combination, sparingly, through the upper leaf area to suggest dead leaves caught in the confused mass that Pandanus can appear to be. Later on these “Umber” streaks can barely be seen, though they give the shaded area so much more depth.

The painting now has the illusion of dimension with the stronger darker colours in the foreground leaping forward from the slightly muted background.
At this point I dig out the photo again. Armed with a #6 full of Dioxazine Purple, and tinted with Cadmium Yellow, I paint in the underside of the dead leaves that are reflecting the light off the sand. I take care to emulate the spiral that marks the area where the leaves emerge from the trunk.
I also paint along the trunk's lower edges with the same colour, to again show the sun's reflection off the sand on the underside of the branches. I have thinned the paint, and use the brush to subtly create the horizontal bands that run up the trunk. These bands are important. They show whether the branch is reaching towards us or away, and are useful tools for the illusion of depth.
Gradually adding more Cadmium Yellow and a hint of Alizarin, I work over the same leaves and trunks, building up the highlights as I go.
Mixing Cadmium Yellow, Alizarin, a smidge of Burnt Umber and White, I paint in the highlights the sun has thrown onto the trunk. This helps give the branches volume.

Time For The Chalk
Using the photo as a guide, with the chalk I mark in the shapes of the leaves that hang down in the top foreground. The leaves in the photo are quite dense and wind damaged, so I edit a lot of the superfluous and damaged leaves. I love Pandanus leaves and the photo I have does not do them justice; nor does it give me the opportunity to emphasise depth. So I create my own, taking care to be true to the “feel’ of the trees.
The leaves have a semi rigid spine which allows them to twist on their axis. This spine often bends or breaks due to the wind, and forces the leaf to kink into interesting angles. Occasionally they remain relatively straight - seeming to defy gravity. They really are unique plants.

With Forest Green, a touch of both Dioxazine Purple, Cadmium Yellow and a #8, I rough in the leaves, exaggerating the shapes.
I paint them so that the elements I like about them predominate. I then lighten the mix with a little more Cadmium Yellow, but add a little Alizarin to warm up the areas that emerge from the shadows, and paint in the areas that I think would be exposed to direct sunlight.
I take this process a little further than I planned to! I get carried away with the way the light falls on the leaves, and continue lightening and brightening, eventually adding mainly white to the highlights.
I then add a glaze of Cadmium Yellow Light over the duller green leaves with a wet #8. Having these brighter flashes of colour coming forward is a technique I use to give the finished painting a lot of depth.
I wake up and leave the tree for a moment, as the sand in the foreground is lagging behind. I should have worked on this area earlier while I was working on the dune.
And Further Development!
Now to clean up the beach.
At this point I am not happy with the shape of the shadow of the tree. It does not look to me to be defining the relatively flat plane of the beach. So, mixing a colour which is close to the already roughed in beach, I chop the top off the shadow.
Happier with the shape, I now start close to the base of the Pandanus tree and work in a mixture of Burnt Umber, Cadmium Yellow, some Alizarin, a touch of Dioxazine Purple, some Ultramarine Blue and White. This colour, which has a warm feel, and appears as a dirty darkish purple/orange (technical term!), will be the sand in the valleys of the footprints.
I reshape the trees' shadow, working away from the base with a #8, gradually adding more Dioxazine Purple, Ultramarine Blue and White to give the illusion that the shadow is receding away from the viewer. The dirty colour is slowly lost to a cleaner pale blue/ purple grey.
At the same time I am defining the edges of the shadows with a #6 to illustrate the footprints in the dry sand. The trunk's shadow, for example, has a lovely undulating line as it stretches across the sand.
The leaves cast a line that is interrupted as the shadows disappear into the tiny valleys. The sand within the shadowed area has a blue-ish highlight across the top of each mini sand-crest, which again becomes lighter and “cleaner” as it recedes from the viewer. This “blue” highlight is the sky reflected on the sand.
Again I start at the base of the tree, and with a colour consisting of the dark orange mixture used previously, and added to White, tinted with both Dioxazine Purple and Ultramarine Blue, I shape the footprints by highlighting the top edges of each little depression. I move into the distance all the time adding more White, Dioxazine Purple and Ultramarine Blue, and with smaller strokes define the way the footprints also become smaller.

A similar process is used for the sand exposed to the sun, however the strength of the sun from the right, overpowers the reflection of the sky on the sand. The depressions in the sand are roughed in using a combination of touches of Burnt Umber, Alizarin and Cadmium Yellow.
The highlights are restricted to the right sides of the sand mounds, and are rendered using almost pure white, but are created with sensitivity and consideration to the shapes' dry sand forms. The white highlights at this stage are far too strong - but a glaze or wash later will sort out the problem.
A dry #12 with Burnt Umber dragged over the sand in the fore and mid ground, but stronger in the foreground, creates a grainy feel and dirties the sand (The sand here is stained by the nearby soil).
With a #12 and a very thin mix of Burnt Umber, Cadmium Yellow, Alizarin and White, this wash is worked over the sunlit foreground to kill the starkness of the white, and “soften” the sand.
A dry #2 is dragged and struck randomly over the surface of both the shadowed and sunlit area, to simulate small twigs, pieces of leaf matter or other pieces of detritus. Adding a couple of fallen leaves to the foreground will help me create the illusion of the undulating sand, as the shadows will drop into the hollows and accentuate the peaks. Burnt Umber and a #4 will shape the shadowed portions of the leaves (I’ll paint in the highlights later). The #4, when cleaned, will also paint in the shadows under them, using the orange/purple mix again (hopefully it is still wet!).
I move on to the trunk, satisfied that I can now make adjustments at a later stage if necessary, without having to do major work.

Alizarin, Burnt Umber, Ultramarine Blue and Pthalo Blue are mixed with a touch of White and the barest hint of Cadmium Yellow, and the trunk is worked over yet again with a colour which can only be described as a “purpley/bluey/brown”. Once dry (a matter of minutes and one of the benefits of doing this with acrylics), the previous colour is lightened with White and brushed on with a #10, to define the rings which circle the trunk.
This shows which branches come toward, or recede from, the viewer, adding to the dimension of the work. The branches cast a slight reflection of the sky in certain areas, so Ultramarine, Dioxazine Purple and White are combined, and are brushed along the appropriate edges.
The sand is very reflective, so with a #6 I strengthen the undersides of branches and leaves with Dioxazine Purple, Cadmium Yellow, and a small amount of Alizarin.

The patches of sunlight piercing the tree and falling on the branches need to be attended to. Burnt Umber, Cadmium Yellow, Alizarin and White are blended to form a “tan” and are strategically moulded around the tree. I am distracted by the leaves, so I thin the “tan” and brush a wash over some of them to warm a couple and to stop all the leaves being a mass of the same colour.
Returning to the trunk I add White to the colour and also add a little more Cadmium Yellow and Alizarin. This is brushed over the highlights allowing the “tan” underneath to soften the transition to shadows on the branches. This process is repeated again until finally almost pure white is applied. The white is too strong, but a couple of very thin glazes will sort that out.
At this point I realize that the piece is called “The Best Seat in The House” and that I haven’t painted the swing!
Even though I would normally leave it till late in the work, I should have consolidated it as I went along, resulting in the swing being “in” the painting not “on” it. I should be able to get away with it, so I paint in the rope and seat with a #4 on its edge, with a similar colour as used in the darker areas of the trunk. I will put in the details at the final stage.
The Final Stage
The work is almost finished. While working on most pieces, I try to finish the entire work to a stage where it only requires glazes and small touches of colour to harmonise the piece. These days I find there is almost no need for more major construction work, though this painting still looks too “clean’ and neat for me.
I think I’ll weather some of the leaves and complete the seat. Burnt Umber is scratched onto some of the leaves with a #2, and dragged randomly over the sand and trunks. Occasionally it creates a mark which doesn’t fit. Usually a rub with a thumb diminishes the errant spot enough to make it work, though sometimes another rub to remove the paint altogether is necessary.
Cadmium Yellow and Alizarin is blended, and highlights the dying ends of the leaves. I exaggerate the brightness of the orange and yellow to reduce the impact of the large green mass of leaves.
The seat and ropes are brushed in again using the trunk colour. Adding White, touches of both Cadmium Yellow and Alizarin create the upward face of the seat, while Ultramarine Blue is added to paint the shadowed detail of the rope.
A slightly dirty, almost white mixture shapes both the highlighted portions of both seat and rope. The sand/shadow colour is remixed and brushed onto the sunlit sand to create the swings shadow. I also paint the sky's reflection into this shadow. I am happy with the way I have resolved my earlier neglect of the swing. It seems to blend in nicely, especially after having dragged a dry #10 loaded with Burnt Umber over the shadow. A few more Burnt Umber flecks with a #2 finish the area.
I now flit over the entire painting touching up, glazing and sometimes painting out small areas which make me uncomfortable. This process can last for several hours before two coats of Gloss Medium and Varnish seal up the work. The Gloss increases the contrast and emphasises the opalescent effect that multiple layers of acrylic glazes and flecks create.

Hope you've enjoyed the first in our series of free painting lessons.
We would love to know how it's gone for you - please send us any images of your completed paintings, and let us know if we can improve our free painting lessons for next time.
Top of Free Painting Lessons Page
Go to Roughing In
Go to Developing Further
Go to Time for the Chalk
Go to And Further Development
Go to The Final Stage

Search This Site:

WTH is Acrylics Anonymous?
For more great painting tips, subscriber only specials and zingin' humour (hmmm, maybe?), subscribe to our monthly e-zine, Acrylics Anonymous. It’s fast, free, and we don’t send you junk. As a valued subscriber, you can purchase our 3 pack of downloadable how to paint with Mark Waller DVDs for only $80, or our downloadable V-log “Coral Reef - Underneath” for only $12.
See your subscription confirmation email for more details.
Subscribe here:
Recent Articles
-
Workshops past. Been & gone. Delve into past notes, info and stories.
Apr 20, 26 07:27 PM
 Mark Waller's workshops past - discover what was learned about, talked about, laughed about and consumed with gusto!
 -
Upcoming Workshops with Mark Waller
Apr 06, 26 11:49 PM
 Upcoming workshops & tutorials in your local areas, check here!
 -
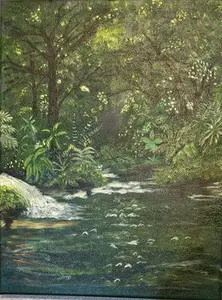
Mangrove of Costa Rica
Feb 09, 26 08:25 PM
 I often visit my sister in Costa Rica where she and her husband live. They have a vacation destination business. People come to stay at one of the homes
 Subscribe to this site!


![]()
About Us | Contact Us | Sitemap | Disclaimer | Privacy
Our Partners:
Copyright© 2007- All Rights Reserved