
- Home
- Painting with Acrylics
- Acrylic Painting Tips
Acrylic Painting Tips To Help You!
Improve Your Painting Process, Avoid Some Traps, and Begin to Understand the Personality Behind Acrylic Paints.
Let's Get Into It!

Acrylic Painting Tips to Keep Your Paints Workable
By workable, I mean mobile, wet and able to be applied with a paint brush, rather than a chisel!
One of the main characteristics of acrylic paints is that they dry fast. Often too fast. Keeping the paint on your palette workable, is very important. Most of us don't dish out anywhere near enough paint, for fear of wastage due to paint drying on the palette.
My set up (above) allows my paint to be workable for up to a week. I lay a wet towel over a frame, over the paints (keeping my towel and paint separate) and then an old garbage bag with a piece of dowel threaded through the end. This covers the towel, keeping it as airtight as possible and holding in the moisture. I use Artists quality acrylic paints by Chroma Australia, Atelier Interactive and Atelier Free Flow.
Without going to this trouble, there are a couple of other options for you:
- Use an old, long and flat airtight tupperware or similar container to hold your paints. Use this only for storing your paint, and use your palette for mixing. You can keep your acrylic paints in the fridge for days in this way.
- Use a long plate or dish and cover tightly with plastic before refrigerating. Again, only use the plate for storage, not mixing.
- While you are painting, keep a water spray bottle handy. You can re-moisten paints (to a degree) which have been sitting on your palette to help keep them workable.
Acrylic Paints Generally Dry Darker
Keep this in mind when painting with acrylic paints. Sometimes this can be a good thing - as it forces you to paint the image a couple of times to get the colour right (eventually you will be a master of mixing colour).
Reworking an area with several layers of slightly different hues and/or shades negates some of the flatness that acrylic paints sometimes has. Painting over again and again, or layering, is a great painting technique for adding depth and dimension to your images.
Using White Over Colors
It is worth noting in this acrylic painting tips section, that when painting white over darker colours, white can tend to appear slightly blue.
Again, if you know about this effect, you can use it to your advantage! If you prefer your whites to appear whiter, you will need to apply more than one coat, or neutralise the slight blue effect with a tiny bit of yellow or orange added to the white. Experiment to see what works best for you and your image.
Acrylic Painting Tips for Your Gradations of Color - Part 1.
When painting a gradation of colour with acrylic paints, the drying time becomes a factor in creating a smooth transition. Your paint can dry before you have moved it around the way you wanted.
A good idea is to paint a band of the appropriate colour on your canvas. Paint the next gradation of colour up against it. Pull the two colours together (sometimes a clean dry brush will make the blending easier. Just make sure they are close at hand, and that you have a few if you are doing several "bands"). Then continue down the page (or canvas) in the same way.
If you try to do the entire gradation of colour at once, your acrylic paint will most likely dry out. You can also add mediums to your paint to slow the drying time if you wish.
Acrylic Painting Tips for Your Gradations of Color - Part 2.
When painting a large area, it is important to keep your paint workable over the area.
Here are two ways of doing this:
- Add a slow or retarder medium to your paint to help slow the drying time.
- Do your first coat quite quickly, without worrying too much about a beautiful, subtle gradation. When applying the second coat, lay your canvas flat and flood the surface with very wet paint - add flow or retarder medium plus water to achieve this, and blend away.
Because of the additives, this second coat can be transparent, but because you already have one coat down, coverage is not too much of a concern. (That is the theory. Tantrums are still a distinct possibility - so ensure unfinished paintings are facing the wall - splattering several almost finished pieces with paint when you hurl your paintbrush in a fit of rage is guaranteed to have you sobbing and rocking in a dark corner).
Acrylic Painting Tips for Your Paint Brushes - Part 1.
Use the right brush for the job. Use as large a brush as possible - because of the fast drying time, using a large brush will speed up your working time (and cut down on aforementioned tantrums).

Acrylic Painting Tips for Your Paint Brushes - Part 2.
If you're not using your brushes regularly, wash them out in water and leave them to dry. If you leave them in water, they will rot and the ferrules will rust.
Also, they will smell, and REALLY not in a good way.
Acrylic Painting Tips for Your Paint Brushes - Part 3.
Some acrylic painting techniques can be quite harsh on brushes; especially if you do a lot of dry brush work in your paintings. For this reason I only use cheap brushes. There is no point spending a lot of money on brushes if they are going to be trashed within days.
Clean Out Your Water Pot Regularly
Acrylic paint remnants left sitting in water pots really smell terrible. Like seriously bad. It can be very difficult to explain to clients who come into your studio that the smell is actually coming from the water pot and not you…….although if you need it as an excuse…….! Make sure you empty your water pot and clean it out at least once a day. (Hmmmm note to self...)

Acrylic Painting Tips For Speedy Painters
If you are on a mission, the drying time of acrylic paints will work to your advantage. If you want to work quickly between layers, put your painting in the sun for a few minutes. Then get back into it. It's quite amazing how quickly the paints will dry, especially with a little help from the sun.
Hope these basic acrylic painting tips have inspired you to explore and experiment further with this fun and versatile medium, and have solved a few problems as well.
For more tips and techniques to make your painting process easier and more fun, check out my Tips & Techniques DVD, now available to download! Enjoy...
For more tips, special offers and anecdotal wit that's outta this world, make sure you subscribe to our monthly e-zine, Acrylics Anonymous.
It’s fast, free, and we don’t send you junk. As a valued subscriber, you can purchase our 3 pack of downloadable how to paint with Mark Waller DVDs for only $80, or our downloadable V-log “Coral Reef - Underneath” for only $12.
See your subscription confirmation email for more details.
Subscribe Here:
Back To Painting With Acrylics
Back to Explore Acrylic Painting Home Page

Search This Site:


WTH is Acrylics Anonymous?
For more great painting tips, subscriber only specials and zingin' humour (hmmm, maybe?), subscribe to our monthly e-zine, Acrylics Anonymous. It’s fast, free, and we don’t send you junk. As a valued subscriber, you can purchase our 3 pack of downloadable how to paint with Mark Waller DVDs for only $80, or our downloadable V-log “Coral Reef - Underneath” for only $12.
See your subscription confirmation email for more details.
Subscribe here:
Recent Articles
-
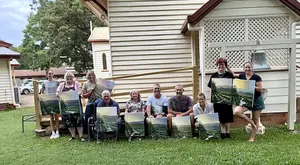
Workshops past. Been & gone. Delve into past notes, info and stories.
Apr 20, 26 07:27 PM
 Mark Waller's workshops past - discover what was learned about, talked about, laughed about and consumed with gusto!
 -
Upcoming Workshops with Mark Waller
Apr 06, 26 11:49 PM
 Upcoming workshops & tutorials in your local areas, check here!
 -
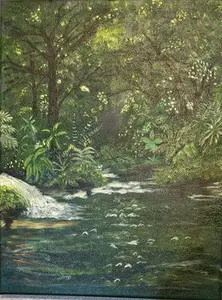
Mangrove of Costa Rica
Feb 09, 26 08:25 PM
 I often visit my sister in Costa Rica where she and her husband live. They have a vacation destination business. People come to stay at one of the homes

 Subscribe to this site!


![]()
About Us | Contact Us | Sitemap | Disclaimer | Privacy
Our Partners:
Copyright© 2007- All Rights Reserved