
- Home
- Painting Tutorials
- How to Paint a Whale
How to Paint A Whale - Follow Along!

Learn to paint this incredible dynamic humpback whale with me. Discover how to obfuscate mistakes with bubbles, create realism by adding scratches and bumps, and understand how to push elements further underwater with simple techniques!
We did this painting as a workshop in late 2022, and this webpage is based on the workshop notes we created for this workshop. Note the background was painted first, separately, and can be followed along with in the below video :)
Feel free to follow along with our Youtube tutorial on how to paint a whale here:
How to paint a whale - materials:
Canvas:
- 90 x 70cm pre-primed stretched canvas, landscape orientation
Brushes:
- Large house painting brush (approximately 5cm across), for blocking in background colours.
- Synthetic flats in varying sizes for the detail, approximately 12mm, 7mm, 4mm.
- A larg-ish fan brush to make some swirly suds
Atelier Interactive Artists Acrylics:
- Titanium White
- French Ultramarine Blue
- Pthalo Blue
- Cadmium Yellow Light
- Burnt Umber
How to paint a whale - the beginning
This painting will be a bit different. People like structure, but in this tutorial we’re going to give up a bit of that structure. We’re going to look at the water in the background, suds and bubbles, and use these elements to hide bits we don’t want.
When we follow a formula, people tend to start off well - but at some point there will be a challenge - and then we watch the anxiety increase. We’re not going to do this today. We’re going to relinquish ourselves from the constraints of these structures, and therefore our anxiety too. This is going to be like a life exercise, this painting exercise will be a “let-go” of the structures of our lives (to some degree).
So we’re going to play a little game. Notice the dialogue in your head, while you’re painting. Start watching the voice, when it start to spiral. Keep listening. If you start feeling tense, notice that, and realise that “self talk” is not serving you, or this process. That feeling is not going to improve your outcome.
We’re going to dance with the circumstances. See what happens when we paint an element - and if we don’t like it, add some bubbles to hide or de-emphasise it!
Having said all that, there is some information that is very important. For example the whale shapes, and how bubbles behave underwater.
Air will do two things underwater. When it’s pushed down, it’ll form particular shapes, and then when it tries to go up again, it will behave and look different again.
So, a quick aside: About a week after Mark’s brain surgery he went to paint for the first time. He realised quickly that the technical, mechanical skills would need to be re-learned. However, the thing that made him weep tears of joy, was that the questions were still there. Things like, “where is the light coming from?”, “what shape is that leaf?”, “what colour would that shadow be?”.
The questions are most important. Especially when your anxiety kicks in. When you feel this happening, try to take “you” out of the equation, to attempt to look at it dispassionately. For example, instead of going on a thought spiral of how terrible you are at painting, think (for example) “what could I do to improve that shape?” When you take “you” out of the equation, you free yourself to create.
How to paint a whale - sketch it out
So, we’re going to start with chalk this morning, and we’re going to chalk in your whale. Then later on we’re going to colour it in!
We’re going to stick with the basic shape of the whale, with his snoot sticking out and down a little, just to keep it a bit easier.
Mark chalked in a couple of different whale shapes on a dark background to demonstrate the different parts of a whale. One a whale about to breach, showing the belly. The “throat pleats” can be quite difficult to manage effectively, so we’re just going to represent those in a less technically realistic way.
At this point we spent a bit of time looking at whale shapes, pectoral fins for example are a third of the length of a humpback whale.
Everyone spent a good while chalking in their whales with Mark’s help. Those who were ready to move on used thinned Dioxazine Purple to “lock in” those shapes and lines of the whale’s body.

At this point Mark called everyone up the front to demonstrate on the black canvas using a dark mix of Atelier Interactive Pthalo Blue, Cadmium Yellow Light, Burnt Umber and a very small amount of White. Mark painted a whale shape in, that was similar to the background canvas (black) colour, just to demonstrate how little detail you need to put in to demonstrate realism.
He then mixed Pthalo Blue and White to start painting the highlights. He added more White to this colour to build up these highlights, and kept adding more white moving into the foreground elements, to get the idea of how this whale is receding off into the distance. He added a tiny bit of reflection on the underside of the surface of the water to “place” the whale in the picture.
This demo shows how Mark has pretty much just painted the highlights. But you can take this further. These are strategies that you will be using in your own painting.
When painting your own whale, keep in mind anything you want to appear further away is going to have more Pthalo Blue (water colour) in it, and anything closer to you is going to have more White.
Mark also demonstrated a “bubble” technique using a ratty old brush and a downward kind of “stabby” motion. Again, adding more Pthalo Blue to the bubbles pushes them further away.
Mark started by dishing out colours on his palette - Burnt Umber, French Ultramarine Blue, Pthalo Blue and White.
 |
 |
How to paint a whale - start blocking in
We’re going to keep in mind the previous exercise here. We’ll have the darker colours of the whale moving back into the Pthalo Blue areas. As the “white” areas (like the throat pleats) fade back into the distance they also have more Pthalo Blue.
A great recipe for the shaded areas of the whale is a mix of Burnt Umber and French Ultramarine Blue. It’s easy to lighten and darken this colour. Mark is going to go in and paint the shaded areas under the whale’s chin and under the jaw line.
While you have this colour you can add a couple of the nodule bumps (tubercles ;) ), put the eye in and the start of the pectoral fin. Using that colour Mark will start to suggest the beginning of the ventral pleats.
To this colour Mark added Pthalo Blue (the water colour) and a bit of white as the whale starts receding into the distance. Mark just faded this colour out into nothingness because past that point is where the bubbles are going to be.
For the tail in the background, he added more Pthalo Blue and a touch more white to that colour and painted it in so it’s reasonably indistinct.


TIP: The “whale blue” is warmer French Ultramarine Blue, the water colour is the cooler Pthalo Blue. Anytime we want to push the whale further away, add Pthalo Blue (water colour).
Now - to the transition from the shaded area of the whale, to the area of the whale which has more light on it (the area closer to the surface).
Mark added White to the original “whale colour” of French Ultramarine Blue and Burnt Umber, and a touch more Burnt Umber to warm it up, and painted this along the topside of the jawline. He has left a bit of blue showing through here and there. (There will be bubbles!)
Now, Mark repeated this process, adding more White and Burnt Umber to this colour, to paint into the more “lit” areas at the top of the whale’s head. If this looks too grey or brown right now, don’t worry, this can be rectified with a bit of Pthalo Blue glaze later on.
Mark also used this colour to create the highlight on the top of the whale’s eye too. Quite often there is a little scallopy shape on the whale’s jawbone, and using that last highlight colour Mark suggested that shape (dry brush, very little paint) along the whale’s jawbone.
TIP: Take more time with the foreground area because the rest of it will disappear into bubbles for the most part.


How to paint a whale - adding details
Mark went back at this point to start painting in the ventral pleats so that everyone knows where to start this lighter area. Whales are different in this area - not every whale has the same markings under their chin. Mark mixed up Pthalo Blue and White and started defining these ventral pleat lines where they join the jaw line.
TIP: Use chalk to mark those ventral pleat lines in first.
Mark added more Pthalo Blue to this colour to represent those pleats further down the whale’s throat (creating the illusion of more water), and then more White to join them in the foreground area again.
TIP: Think of the pectoral fin as a blade, it can twist and turn from the shoulder. It’s flexible.
This is a flexible exercise. It’s a bit of a see-saw. If you don’t get the colour right straight off, that’s ok. Fix it up when it’s dry. As long as you stay within the lines, you’ll be right! Use a bigger brush for blocking in these bigger areas.
If you’re following the ventral pleats, make sure the brushstroke follows that direction. This looks a lot more natural in the long run.
A whale’s jawbone is really very broad. It’s narrower at the pointy end and wider at the body end.
At this juncture Mark got everyone to gather around. He noticed people are sometimes unhappy with the colour of their whales. An easy way to fix that is to use GLAZING technique. He demonstrated that on the previous exercise on the black canvas by pushing elements back using Pthalo Blue, thinned as a glaze.
There’s something else Mark wants to show that may take the pressure off too. He brought up the “real” whale painting again. He mixed White with a little bit of Pthalo Blue and started scrubbing in some bubbles over the top and behind the whale’s tail. Don’t worry too much if you’re not happy with parts of your whale. There are lots of opportunities to bury it.
TIP: The more the contrast, the sharper the transition. For example, if the whale has a wide belly, the transition will be soft. For the flippers however there will be a lot of contrast as there is a sharp transition between light and dark.

Painting a whale - finishing touches
Ok, we’re now going in with our darkest dark, a mix of Pthalo Blue and Permanent Alizarine, and we’re going to use a small flat brush and establish the jaw line (closest to the eye), as well as the wrinkled detail around the eye and the top of the pectoral fin.
TIP: Break up your lines to create realism.
You can also use this colour to strengthen the ventral pleat lines, to blend into the jaw line more naturally.
A large part of the next part of the painting will be establishing all of the battle scars and scratches etc.
This dark colour will become the framework to “hang things off”.
Now Mark demonstrated using a dark mix of Pthalo Blue and White, thinned with some water, (and trained the brush into a flat shape with his shirt), to start adding scars and scratches to the tail. Because of the motion of whales through the water, they will end up with scrapes and scratches on their hard corners and edges (for example the edge of their tails). You can take a lot of the paint off and add some less distinct lumps and bumps further in the distance with that diminished paint as well.
Mark added more White to that mix and started on the front flipper (this will be getting a little more light on it). The front edge of the flipper will have scrapes and scratches. And, wherever there is a crease in a whale there will be little barnacles as well. Add a few marks here and there to illustrate these.
While we have this colour we can also start the process of painting those ventral pleats.
TIP: Don’t stress about your values here, as you can use glazes to fix this later - glazing adds more depth to your painting and therefore, more realism.
Also coming into the leading edges of the pleats on the jawline, there will be little barnacles. As the paint diminishes off your brush use this opportunity to create marks in the areas you want less distinct.
Paint a few bumps and scratches here and there along the jawline, in the shaded area.
TIP: You can use chalk here to keep it non-committal at first.
TIP: There are usually lots of scratches and scrapes (and scars) on the nose. Let the brush do the work here as much as possible, so you’re not making patterns.
TIP: When painting the jawline colour, use a dry brush and “scrub” it in to create that kind of “mottled” whale-like texture.
Mark now mixed a colour slightly lighter than the background water colour (Pthalo Blue and White) to paint in the far pectoral fin.
He then mixed the original whale colour (Burnt Umber, French Ultramarine Blue + White - and a little Pthalo Blue) wet in wet, to create the “armpit” colouring in the far fin as well as the scratchy scars.
While we have that whale colour, Mark added the tubercles - they run roughly parallel to the jawline.
Use this colour gently to give the ventral pleats a bit more volume.
TIP: It’s helpful to be reasonably efficient with the colour you have on your brush - find other parts in your painting you can use it on.
An aside:
Our brains are hardwired to learn something, then know that thing, and then we tend to stop looking. For example, “the cat sat on the …..”. Our jobs as artists is to put enough information in our paintings to convince the viewer to connect the dots. We want to regurgitate the information in a powerful way that generates a connection with our viewer.
We do need to approach what we’re doing as if it’s the first time we are looking at it - we need to really observe the information, and keep looking at the world with wonder. Your job is to be a storyteller.
When the surface of the water is broken, air gets pushed down into the water, and it kind of “billows”, and then as it makes its way back to the surface, it creates “trails”. Bubbles reflect light - this is why they appear white, it’s actually the bubbles reflecting light, not the air getting trapped. Mark added some trailing bubbles to create more drama here.
In these conditions, the more white you add, the closer you bring an object to the viewer.
Keep thinking about the shape you want your mark to make - NO DAUBING!
One of the things to remember, when the bubbles hit the surface, because the surface is relatively flat, the bubble cloud becomes flat.
TIP: If you’re anxious about any part of your whale, it is easily made indistinct - there can be more of a story there in doing that, especially with all that turbulent water around it.
When a lot of bubbles hit the surface the first thing they do is spread out, creating big “rings”. We can paint these in to contribute even more to the story.
Bonus - Atmospheric Perspective:
Air is not clean and clear. It has ‘stuff’ in it. Same thing with water. It has a colour. To create the impression of something appearing to be further away, you need to establish the object colour in the foreground, then add sky colour to push them further into the background. You can use this principle underwater as well. Establish the colour of the water first, and then the colour of the object in the foreground. To push the object (or parts of it) into the background, add more of the water colour to that colour. This is an incredibly effective technique, and useful in all sorts of applications.


If you're interested in painting more underwater scenes, you might like to check out these downloadable/streamable tutorials:


Search This Site:

WTH is Acrylics Anonymous?
For more great painting tips, subscriber only specials and zingin' humour (hmmm, maybe?), subscribe to our monthly e-zine, Acrylics Anonymous. It’s fast, free, and we don’t send you junk. As a valued subscriber, you can purchase our 3 pack of downloadable how to paint with Mark Waller DVDs for only $80, or our downloadable V-log “Coral Reef - Underneath” for only $12.
See your subscription confirmation email for more details.
Subscribe here:
Recent Articles
-
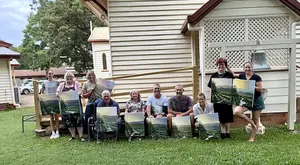
Workshops past. Been & gone. Delve into past notes, info and stories.
Apr 20, 26 07:27 PM
 Mark Waller's workshops past - discover what was learned about, talked about, laughed about and consumed with gusto!
 -
Upcoming Workshops with Mark Waller
Apr 06, 26 11:49 PM
 Upcoming workshops & tutorials in your local areas, check here!
 -
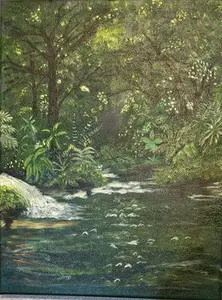
Mangrove of Costa Rica
Feb 09, 26 08:25 PM
 I often visit my sister in Costa Rica where she and her husband live. They have a vacation destination business. People come to stay at one of the homes

 Subscribe to this site!


![]()
About Us | Contact Us | Sitemap | Disclaimer | Privacy
Our Partners:
Copyright© 2007- All Rights Reserved