| Back to Back Issues Page |
 |
|
Acrylics Anonymous, Issue #118 -- Chuck That Paint Around! September 01, 2022 |
Passionate about painting with acrylics? Need a monthly fix chock full of inspiration? Need some help to take the pain out of your painting process? It's all here for you. Acrylics Anonymous. Zero elitism. Dive in. If you enjoy Acrylics Anonymous, and you know someone who might also enjoy it, you can share by forwarding it to your friends! If you are receiving this because a friend has forwarded this to you, and you would like to subscribe, click here! 
Every month, we will produce a Subscribers Only "sealed section" - just keep scrolling to see it. It could be a painting technique, a short video tip, or anything we can think of that we reckon you might enjoy. Please let us know what you think, we love your feedback! To leave comments, contact us here.

Work it out! If you find you've overworked your surface and have some texture there that you don't really want, a coat of Impasto Gel (Heavy Gel Gloss) applied thickly over the whole area, and layed off gently when still wet, will quite often flatten the surface again, hiding that uneven texture and making it appear more uniform. 
Meet The Wallers will be available to be streamed soon! We have one more local screening in Ballina tonight, Thursday 1st September. After that, cinema screenings will slow right down. Make sure you stay up to date with the Meet The Wallers Facebook page for all the latest info on streaming and more! Click here to buy tickets to the Ballina Fair screening tonight at 6.30pm New Shorts on Youtube Since last month we have a few more "Thoughts From The Easel" up on Youtube, which are causing a bit of a buzz around the place! We are really enjoying putting these together and hope you're enjoying them too. Here's a few more you may not have seen yet. Click here for the short clip "Close Enough" Click here for the short clip "Just This Moment" And click here for the short clip "Have You Ever Noticed" Esk Workshop - spots available October 8-9th We still have a few places available for this workshop which is coming up fast! Learn how to paint a gorgeous, dramatic and action-filled humpback whale in the beautiful Somerset Valley, QLD. Click here for more info on "A Whaley Good Workshop"  Every month, we choose an Artist from our
forum
to showcase.
Every month, we choose an Artist from our
forum
to showcase. You can even nominate someone if you like. (Or yourself!). To do this, check out the forum and then send us an email! It’s that easy. This month we're featuring artist Kim Mooday, from Devon in the Uk, with their dynamic painting titled "Tamar Class Lifeboat". Thanks so much for sharing this with us Kim, you have captured that sense of drama and movement wonderfully! Click here for more info on Kim's painting "Tamar Class Lifeboat"

Roberto from Columbia is an incredible artist. Watch his compelling time lapse perspective drawings and tutorials via his Instagram here: Go and have an explore around his Instagram - some incredibly compelling paintings too! Jason Anderson, UK based abstract artist started his career as a stained glass artist. His style is unique and captivating, and we hope you enjoy having a look at his work! Jason's work is fascinating, check it out here. If you have a link you like, please share it with us! You can contact us to let us know. Thank you!  This is the section where you can "get your name in lights!" (well at least out there in the internet world!).
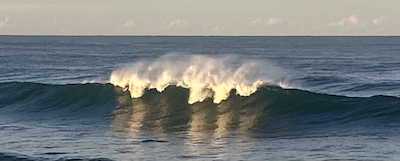
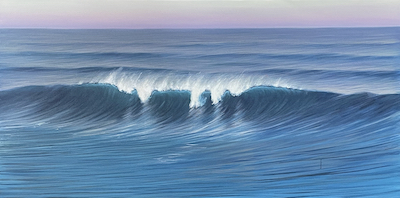
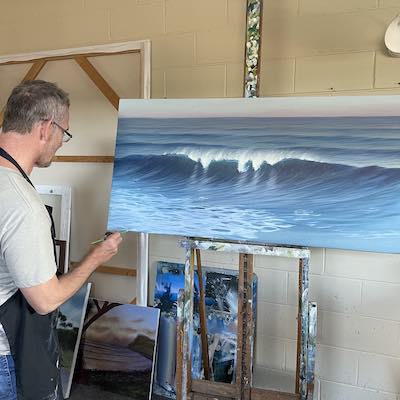
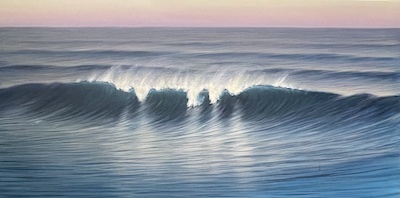
If you have works in progress you would love to show off, or finished pieces you are particularly proud of, we would love to see them! We especially like to hear about the story behind the creation. This month's submission comes from our own Mark Waller with the journey of this beautiful wave painting "Afternoon Light". From Mark: "I was trawling through old photos for some new inspiration, and came across this one. It was at the end of a big swell. The weather had cleared up, it was light offshore, but the ocean still had that ominous atmosphere, and at the same time really lovely, subtle, delicate colours. I also really liked the space around the wave. It just seemed to emerge. This was one of those paintings that happened very quickly.
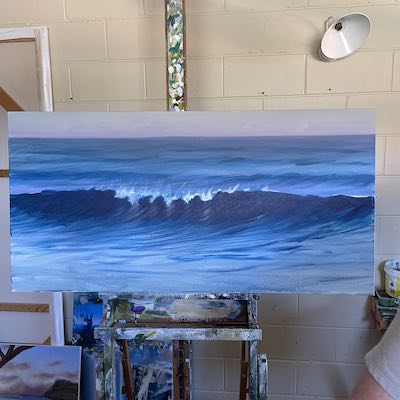
With a thin wash of Dioxazine Purple, I marked out where all the important features were - the horizon, the face of the wave, and the shape of the lip. I had to get the colour in the face of the wave just right. I mixed Pthalo Blue, a little bit of Dioxazine Purple and a tiny bit of Cadmium Yellow Light to green it up a little bit, and shaped the wall of the wave, and with a dry brush suggested the waves receding further out in the distance. I added then a little bit more Dioxazine Purple and Cadmium Yellow Medium and White, and gradually started laying in the colour toward the base of the waves. Even at this early stage, I wanted to represent the transition from the darker face of the wave, to the lighter, flatter parts that were reflecting the sky. I then mixed into a lot of White, Cadmium Yellow Medium, a tiny bit of Dioxazine Purple and some Permanent Alizarine to represent the flatter areas between the waves.
I then decided it was a good time to paint the sky. I roughed that in using a mix of Dioxazine Purple, a little bit of French Ultramarine Blue and Permanent Alizarine, and painted a line right along the horizon. I gradually added more White and Permanent Alizarine as I painted up the canvas, gradating into White and Cadmium Yellow Medium. I blended these bands of colour together - I wanted to create the sense of the sun disappearing behind the viewer. I took a little bit of that colour and painted in on the tops of the backs of the waves very quickly, but enough to give me a sense of where to go in the next process - the reflections.
While the wave itself is only a small part of the picture, I needed to be very attentive to the details that I put in it. It was really important to get the colour right, and the shift in tone to create the illusion of the wave gradually becoming steeper. Once this was done, I went back to the sky to establish the light accurately. It was easier to do this before I could attend to the reflections anywhere else in the picture. I mixed the same colours as previously, just spent more time blending them and getting the gradations just right. I stole a little bit of the wave colour, mixed some Dioxazine Purple and White with it to come up with a strange, purply grey-green-y colour. This was going to be my horizon, and it needed to represent the colours in the sky. I did this fairly quickly to take advantage of the sky colour still being wet. I wanted to blend them together to soften the transition between sky and sea. This all adds to the illusion of the water
being reflective.
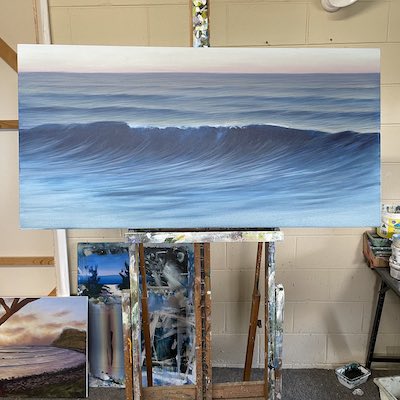
Once I was happy with that I moved down the painting, adding to that horizon colour some of the blue-green from the face of the wave, and as I came down, added more of the wave colour, particularly in the places where the swell lines were strongest. I mixed some Cadmium Yellow Medium, Dioxazine Purple and a little bit of Permanent Alizarine, and added that to the wave colour, and began to establish the flat areas between the waves, using more definite and defined brush strokes the closer I came to the foreground. Using the above mix, again, but mostly Cadmium Yellow Medium, Dioxazine Purple and Permanent Alizarine, I then reflected the sky on the backs of the waves to give them a little more definition. Good as gold.
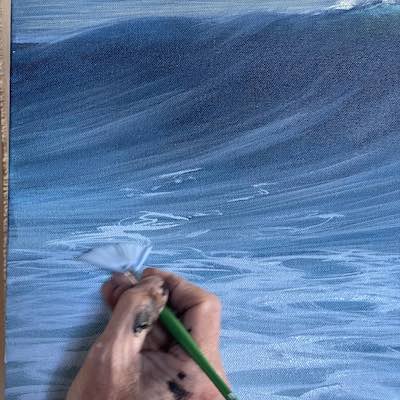
I also used this in the foreground, to flatten the water in front of the wave. Now for some fun. I mixed up some neat White, and began the process of creating the lip of the wave and the spray coming off. I never get tired of that. With a dry brush, I dragged that colour down the face of the wave in front of the intense parts to create the impression of reflections on the flat area in front of the wave. This is a great trick for creating illusion, and I find painting it quite meditative.
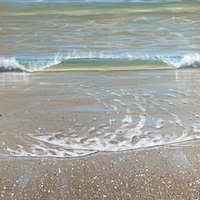
I toyed with the idea of adding some swirling suds in the foreground. For this I mixed up some White with Dioxazine Purple and Pthalo Blue, and using a fan brush suggested the loose swirls left by a breaking wave. I fiddled around like this for a while and stepped back and looked at the painting. I decided that the wave had lost something by having the suds in the foreground, it seemed to have lost some of its impact and nuance. I mixed the colour of that flat area in front of the wave again, and painted over it, blending back into the face of the wave.
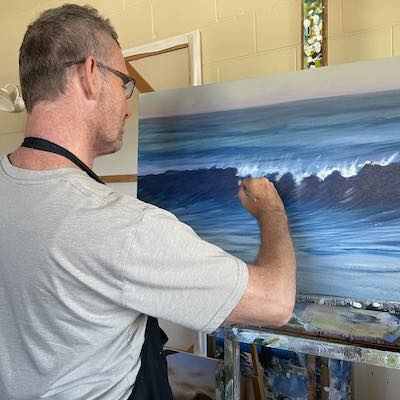
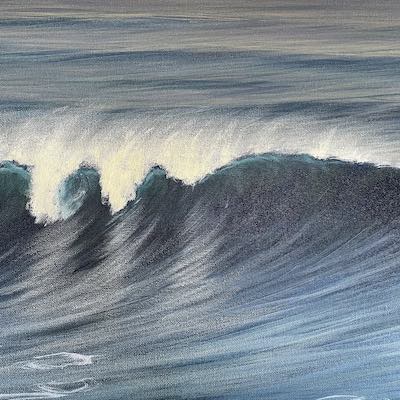
It was now a matter of recreating the illusion of the surface of the water by reflecting the sky, keeping in mind the lines a wave makes as the ripples are drawn up its face, I gradually moved down the picture into the flatter areas, using a shorter, sharper brush stroke, the closer I got to the bottom. I repeated that same process, reflecting the whitewash on the surface of the water in front of the wave. I walked away and left it.
When I came back to it, and looked at the reference photo, I realised just how much colour there was in there, so I set about adding that to the picture. I made a mix of Dioxazine Purple and White and painted the spray feathering off the back of the wave. I then mixed White with a tiny bit of Cadmium Yellow Medium and did the same thing, this time paying attention to where the sunlight was hitting it directly, both on the whitewash areas and the spray. I then used that same colour to again suggest the reflections on the face of the wave on the flat water in front of it. Voila! While it is a simple picture, I find it very compelling and it has a lovely calming soulfulness about it. Meditative." Nice.
Follow Mark's Instagram here. Follow Mark's Facebook here. For Mark's website, follow here. We hope you enjoyed this issue of Acrylics Anonymous! If you have any suggestions, comments or feedback for the ezine or our site, please don't hesitate to contact us. Until next time, make sure you stay safe and well, and don't forget to chuck some paint around! Cheers from Frankie & Mark :) For our Youtube channel, click here. To join our Youtube channel as a member for a few bucks every month (in exchange for even MORE awesome perks, click here. For our Instagram, click here. For our Website, click here. For our Facebook page, click here. For our Pinterest, click here. For our Tik Tok, click here. |
| Back to Back Issues Page |