| Back to Back Issues Page |
 |
|
Acrylics Anonymous, Issue #122 -- Tropical Delight! February 01, 2023 |
Passionate about painting with acrylics? Need a monthly fix chock full of inspiration? Need some help to take the pain out of your painting process? It's all here for you. Acrylics Anonymous. Zero elitism. Dive in. If you enjoy Acrylics Anonymous, and you know someone who might also enjoy it, you can share by forwarding it to your friends! If you are receiving this because a friend has forwarded this to you, and you would like to subscribe, click here! 
Every month, we will produce a Subscribers Only "sealed section" - just keep scrolling to see it. It could be a painting technique, a short video tip, or anything we can think of that we reckon you might enjoy. Please let us know what you think, we love your feedback! To leave comments, contact us here.
Of course you do!
Click here for the link to the video!

Island Time. If you're thinking about taking your paints to a tropical location (for example a workshop in Fiji ;), just be aware that your paints can behave differently depending on the level of humidity in the air. Humid environments can actually make it easier to work with acrylics. So while you're suffering, your paint is flowing effortlessly! 
Some Changes. You may've noticed some changes around the site! We are moving into the 21st century. Bear with us while we make some changes we think you'll love! One of these is that we will now be producing Acrylics Anonymous once every two months. Still with all the segments you love, but now with just that *little* bit more anticipation 🙂 Fiji Workshop - November 2023 Mark is coming back to Fiji for another fantastic tropical workshop this November. Check out the link for all the info and make your booking now! Limited places! Click here for more information on Mark's Fiji workshop! Esk Workshop - May 2023 Yes! Another workshop in Esk, QLD, is in the planning stages. Make sure you're signed up to our workshops mailing list for all the info here - coming soon. Join our workshops mailing list here! New on Youtube Since last AA we have released several shorts "Thoughts from the Easel" and a time lapse demo. Here's a few more you may not have seen yet. Click here for the short "I Painted Today" Click here for the short "Grateful" Click here for our timelapse demo on painting a tropical beachscape! And click here for our latest short "I Shouldn't Be Here" **Meet The Wallers**
 Every month, we choose an Artist from our
forum
to showcase.
Every month, we choose an Artist from our
forum
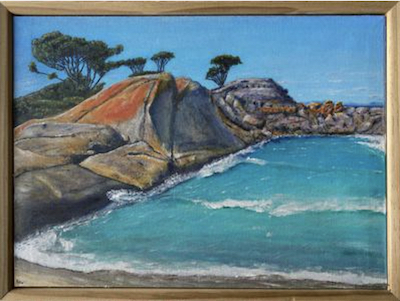
to showcase. You can even nominate someone if you like. (Or yourself!). To do this, check out the forum and then send us an email! It’s that easy. This month we're featuring artist Reg, from Portalington, VIC, Australia, with their painting "Bay of Fires". Thanks so much for sharing this with us Reg, what a fabulous job you have done! Click here for more on Reg's piece "Bay of Fires"

Land artist Justin Batemen creates incredible, impermanent mosaic portraits using found pebbles and stones on site. Just incredible! Check out Justin's work here! And more stunning pebbles - this time a collaboration between human and mother nature. This Soviet Bay renamed “Glass Bay” was a Soviet-era dumping ground for wine and vodka bottles. Now it is a protected beach popular with tourists, for the gorgeous seaglass pebbles the ocean has turned these bottles into. Check out Glass Bay here. If you have a link you like, please share it with us! You can contact us to let us know. Thank you!  This is the section where you can "get your name in lights!" (well at least out there in the internet world!).
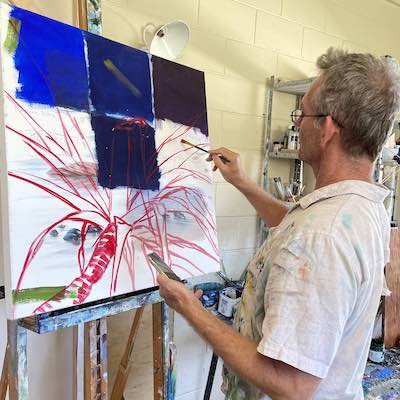
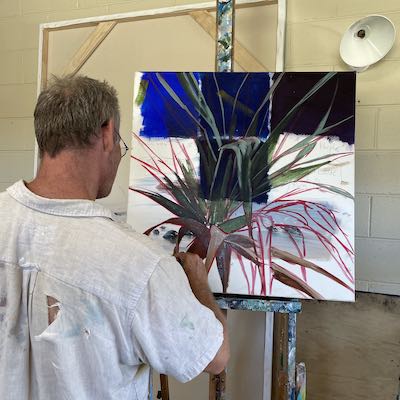
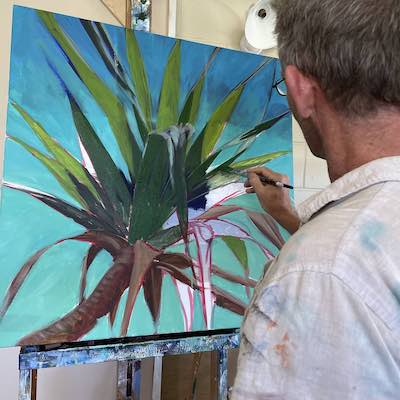
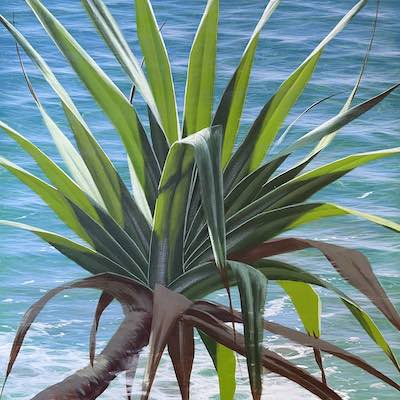
If you have works in progress you would love to show off, or finished pieces you are particularly proud of, we would love to see them! We especially like to hear about the story behind the creation. This month's submission comes from our very own Mark Waller. From Mark: I found this old canvas in the depths of my studio that I’d clearly been messing around with dark blues on. Clearly what was on there was never going to be a finished piece, and those dratted pandanus’ caught me again. There’s something about that square format that seems to lend itself to that “spiral” pandanus explosion.
So I dragged out some Permanent Alizarine and marked out the structure. I then mixed Dioxazine Purple, Forest Green and Cadmium Yellow Medium to create a lovely dark green, and blocked in all the darker shaded areas.
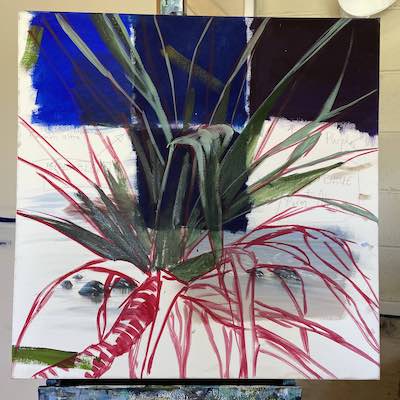
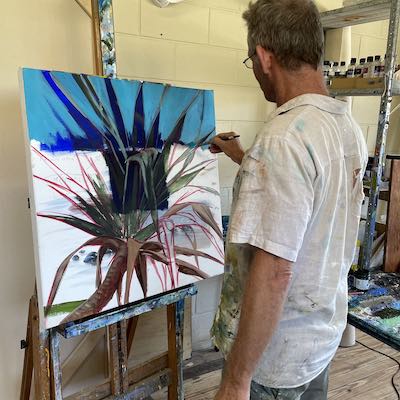
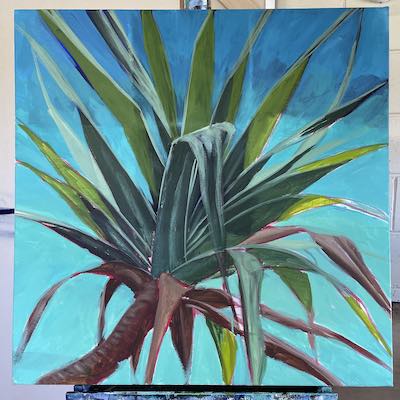
I added some White to this mix and started to shape some of the leaves that were emerging from the shaded area, and put some highlights in the leaves that were in direct sunlight. All very loose, all part of the “construction” stage.
I got some Burnt Umber and Dioxazine Purple, and used the same process as above to render the dead leaves at the bottom of the picture. I added White to this to create highlights here and there. Water time!!
I then mixed French Ultramarine Blue, Pthalo Blue, some Cadmium Yellow Light and White and rendered in the water, starting from the top of the canvas. The French Ultramarine Blue was to create the illusion of water further away (sky reflected). I came down the canvas, diminishing all of the French Ultramarine Blue, and relying on the Pthalo Blue, Cadmium Yellow Light and White combination to create the illusion of water getting shallower, gradually adding more Cadmium Yellow Light and White as I come down the canvas.
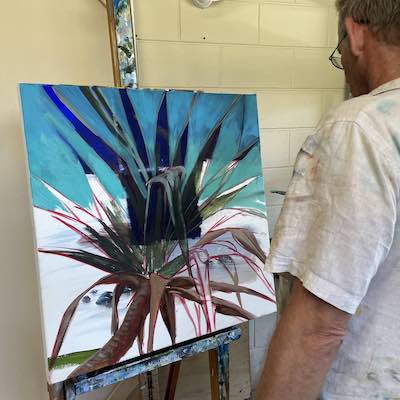
An Aside! So many people have asked why I paint the background in around the leaves. The reason is thus: as the pandanus is the feature, I want to get the structure of the pandanus right first. Which doesn’t always go according to plan :) If something’s in the wrong place, I can always paint over it with the colour of the water later on, and still move things around. I painted the dark colours so that when I paint the water over the top, the underpainting is still vaguely visible.
Now it’s time to brush in the backlit leaves, using a mix of Cadmium Yellow Medium and Pthalo Green (ooh! Nice and bright).
I worked over some highlights on the pandanus tree - established which leaves were dead and dying, and got a better “feel” for the placement of all of the leaves.
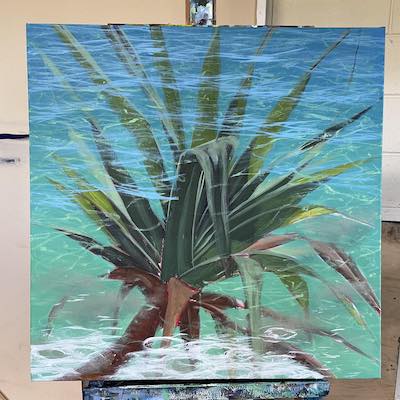
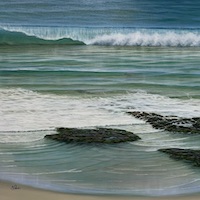
Back to the water. I repainted it, taking more time with the gradation this time, and covering the canvas. I then mixed Cadmium Yellow Light, Pthalo Blue and White, painting the loose diamond-y shapes of light being refracted onto the sand underneath. As I painted these down the canvas, I added more Cadmium Yellow Light and White, to create the illusion of the water getting shallower, and backed off the Pthalo Blue altogether.
With a thin mix of White paint, I suggested the lovely round trails left by a breaking wave in the bottom left corner.
Then, mixing French Ultramarine Blue, Pthalo Blue and White, I started suggesting ripples on the surface of the water in the distance, gradually moving down the picture and eliminating the Pthalo Blue as I did so. I repeated this process several times, adding more White to this colour to suggest the steepness of parts of the waves. I then tidied up the suds.
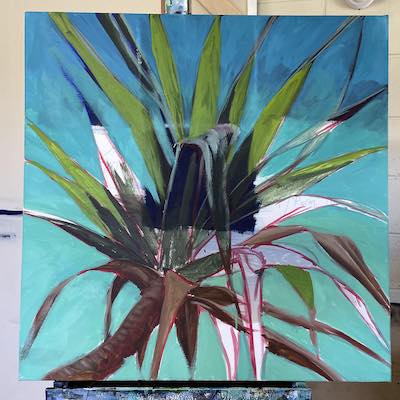
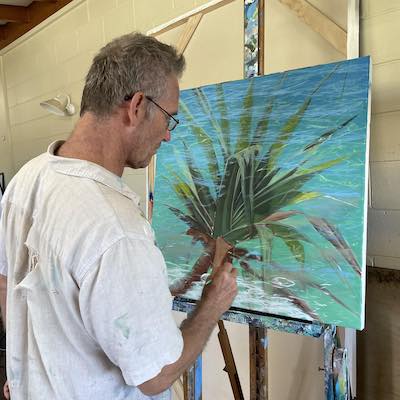
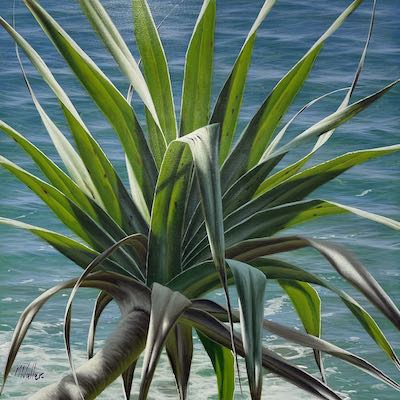
Into the depths of the pandanus tree! I used White, a tiny touch of Forest Green and Cadmium Yellow Light, and brushed in the highlights on the leaves that were being directly hit by the sun. Using the backlit leaf colour of Cadmium Yellow Medium and Pthalo Green, I put some volume in the leaves, and added more to the leaves that were being hit directly by the light, and less to the leaves that were more vertical.
I mixed French Ultramarine Blue with Forest Green and some White, and suggested sky being reflected on the leaves in the shadowed areas. This adds to the illusion of leaves leaning toward you, or tilting away. Layer upon layer upon layer. I mixed Burnt Umber, French Ultramarine Blue and White, and painted the highlights in the shaded areas on the dead leaves and the trunk. I used neat Burnt Umber on the tips of the leaves. From here on in it was pretty much tidying up the edges of the leaves, the transitions and gradations within the leaves, adding scratches and serrated highlights (neat White is great for that in full sun). I strategically added a few highlights on the leaves to suggest the light shining through the leaves above, and to create a little more interest, and VOILA. A(nother) pandanus painting :D
For Mark's website, click here. For Mark's Facebook page, click here. We hope you enjoyed this issue of Acrylics Anonymous! If you have any suggestions, comments or feedback for the ezine or our site, please don't hesitate to contact us. Until next time, make sure you stay safe and well, and don't forget to chuck some paint around! Cheers from Frankie & Mark :) For our Youtube channel, click here. To join our Youtube channel as a member for a few bucks every month (in exchange for even MORE awesome perks, click here. For our Instagram, click here. For our Website, click here. For our Facebook page, click here. For our Pinterest, click here. For our Tik Tok, click here.
|
| Back to Back Issues Page |