| Back to Back Issues Page |
 |
|
Acrylics Anonymous, Issue #039 -- Stop. Collaborate and Listen. June 01, 2015 |
1st June 2015, issue 039 Passionate about painting with acrylics? Need a monthly fix chock full of inspiration? Need some help to take the pain out of your painting process? It's all here for you. Acrylics Anonymous. Zero elitism. Dive in. If you enjoy Acrylics Anonymous, and you know someone who might also enjoy it, you can share by forwarding it to your friends! If you are receiving this because a friend has forwarded this to you, and you would like to subscribe, click here!  Subscribers only…..shhhhhh…sealed section just for you!
Tip of the month News Artist In Focus Links we like Works in progress…..show us your paintings! 
Every month, we will produce a Subscribers Only "sealed section". It could be a painting technique, a short video tip, or anything we can think of that we reckon you might enjoy. Please let us know what you think, we love your feedback! To leave comments, click here.

Get Outside and Get Inspired! Inspire yourself with the collective artistic consciousness. Take yourself out into the world and check out your local, grass roots galleries. Seeing what other people are creating, and how they are creating can inspire all sorts of different avenues for your creative inspiration. 
Website Changes… In the next little while we’ll be changing the site over to become more mobile responsive. If you have any suggestions for how you want it to look, feel, or function, please contact us! Contact us with your ideas... Workshops We have workshops coming up in Woolgoolga, Sydney and Fiji in the next 6 months. Make sure you’re signed up to our workshops mailing list for all the latest info! Click here for more info... Just starting out with painting? Take advantage of your June discount and grab yourself a copy of our ebooklets. Get yourself set up right to start up right. Click here to join our workshops mailing list...  Every month, we choose an Artist from our
forum
to showcase.
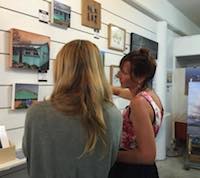
Every month, we choose an Artist from our
forum
to showcase. You can even nominate someone if you like. (Or yourself!). To do this, check out the forum and then send us an email! It’s that easy. This month we’re focussing on artist Penny from the Central Coast, NSW, Australia; and her work “Hurry Up Summer”. Being almost Winter here in the great Southland, this painting brings some much needed warmth to our eyes and hearts. Thanks for the bright cheeriness Penny! read more about Penny's “Hurry Up Summer”

If you need references or new inspiration, look no further. The purpose of this site is to provide free image reference material for use in all creative pursuits. Yay them! Yay us! Click here for a great resource! Brandon Shaefer is a young man on a journey, and he’s happy to share that journey with everyone! Gather some inspiration for your own journey from him today. Click here to have a sticky beak at Brandon. If you have a link you like, please share it with us! You can contact us to let us know. Thank you!  This is the section where you can "get your name in lights!" (well at least out there in the internet world!).
If you have works in progress you would love to show off, or finished pieces you are particularly proud of, we would love to see them! We especially like to hear about the story behind the creation. This month’s gorgeous, wintry painting is from the wonderful Lindy Clarkson, and is a little different. She has structured this WIP as a “lesson”. So settle in for a big ole read-through, then feel free to have a go yourself! From Lindy: “I am an artist and painting teacher with a background of more than 20 years of painting and my style is always evolving. As I continue to grow and learn I pass along everything I know to my students, and we have a lot of fun exploring different painting styles, techniques and mediums. Recently some of my classes have shown an interest in paintings done using palette knife techniques, so I decided to design a painting especially to study and practice these skills. This painting “The Autumn Road” is the result. The steps involved are detailed below, in case anyone is interested in trying out this fun painting process. 1. Because this is such a textured painting, it is perfect for “repurposing” an old or unsuccessful canvas painting! Provided the original painting was done using acrylic paints, all you need to do is make sure the surface is clean, then apply 2 coats of white acrylic gesso using a brush. Thick strokes of gesso are fine, allow to dry. 2. My materials and tools - My acrylic paints of choice are Jo Sonjas but any artists quality acrylic paint is suitable. I use a paper palette because I can clean it up easily and throw away the page when it gets too messy, but a messy palette is fine for this painting! Most of the painting was completed using a palette knife. The correct term for these is actually “painting knife”, and there is a difference, but for the purposes of this painting, I just used whichever shape worked best in any one area. Knives with large “heads” are good for slapping colour on in big areas, smaller heads are helpful to control where you put the paint in more fiddly areas. When using the palette knife techniques, I used the paint “neat” with no added water, allowing the natural texture of the paint to help make the painting interesting. In some areas, I used stiff bristled hog hair brushes to change the texture or to smooth out the paint. When I wanted to keep a textured look , I again used the paint “neat”, but I did water it down when I wanted to create a smoother look, such as when painting the road or the tree shadows. 3. For the first part of the painting, I pencilled in a few lines to decide on the position of the road and the horizon. I placed a variety of blues and aquas , yellow and green onto my palette as well as a lot of titanium white. Then I used a palette knife to “butter” the pale blue colours quite thickly over all the sky area, adding more aqua and white to the place where the road and sky meet. Before this dried, I scraped in some of the greens and yellows to make the impression of some far off foliage. One of the more difficult things in the painting was keeping the surface workable, as acrylics dry quite quickly, even when used thickly as in this case. Sometimes it is better to actually allow an area to dry completely and then just paint right over the top to add more dimension or to change colours. I did this several times in the sky area, including at the end when I changed techniques and instead of using the palette knife, I washed more watery yellow over the glow at the end of the road using a flat brush. 4. The road was painted using a variety of brownish greys, scraped on with a palette knife using horizontal strokes. I used a brush to smooth the paint out a little and also to add some shadows at the road edges. I also dry brushed the middle of the road with a little lighter value colour once it was dry. 5. The hills and background foliage were painted using a variety of greens along with some browns and yellows , so as to look natural. Most of this part was painted using the palette knife but some parts were stippled with a stiff bristled brush for a change in texture. To help with the depth, I tried to keep the whole area around the road/horizon point soft and diffused, as though it's a long way off. The foliage and undergrowth at the front of the painting is stronger and darker. 6. Once the background trees and grasses were complete, I painted in some tree trunks using dark browns. I used a small round brush for this step to keep the shapes precise and clear. 7. I then switched back to using the palette knife, and more clear bright colours, to add lots of leaves and foliage to each tree, remembering to make them look individual but complementary to each other. In some areas I went back and added more foliage using the stiff bristled brush as it can be easier to control. It is important that the viewer’s eye should be led into the middle of the painting and down that road to the horizon, so I kept the lightest, clearest yellows of my highlights in those areas. I also added some dropped leaves to the road using colours from the trees overhead. 8. Once all the trees and bushes were complete, I used a watery version of the tree trunk colour to lightly paint in some shadows for each tree trunk as well as to paint in the mailbox and its shadow. It is really important to be consistent when painting these, as they should all fall in the same direction and also follow the contours of the land. They are darkest where they touch the base of each tree and they fade as they get further away. I added some shadows and texture to the road too, and then applied a little shadow under the dropped leaves. 9. Using a liner brush, I painted in some grasses in the foreground, just to add some more depth and interest, but these should be subtle! 10. To finish, I made a mix of yellow with a hint of red for a nice sunset orange and added lots of water, then washed this over the area where the road and sky meet so that it glows. I have taught this piece several times and it is always interesting to see what each individual student comes up with. Colour is such a personal thing, so I always see a wide variety in autumn hues. Some people love using the palette knife and enjoy playing with the textures, some much prefer to use a brush because they like a softer, smoother look. Personally, I like a mix! Why not have challenge yourself and try a palette knife painting sometime….. You can see more of my artwork on my Facebook page - Beautiful paintings by Lindy Clarkson, and also on my website www.lindyclarkson.com Besides acrylic painting, I also teach Genesis heat set oils, coloured pencils, scratch board and zentangle. I am based on the Gold Coast but I love to travel teach - please contact me if you have group that might like to learn something new! 0755799406” Many thanks to Lindy for sharing her process with this painting, a gorgeous Wintry piece. Wonderful!
Hope you enjoyed this issue of Acrylics Anonymous! If you have any suggestions, comments or feedback for the ezine or our site, please don't hesitate to contact us. Until next time, make sure you chuck some paint around! Cheers from Frankie & Mark :) |
| Back to Back Issues Page |