
Prepare Art To Sell. Tips To Get You Started Selling Yours.
Prepare art to sell and do it right!
Ideas to improve your chances, and some strategies to help avoid disappointment.
So you’ve created a beautiful painting. And one of your friends says “I would LOVE that! How much??”. Your first customer. Hooray!
BUT. Hmmmmm.
There are some points that need to be considered when you're preparing to sell your art for the first time. So let’s look at some.
Subject Matter
MOST IMPORTANT!
What do you paint to give you the best chance of selling?
My advice - paint something that you connect with strongly. It will show in your work, and your enthusiasm for the subject will light you up (and often your customers too).
Prepare Art To Sell - Longevity
If you want to sell your art on a regular basis, you need to ask yourself - do you want your artwork to last? Of course you do! So, you need to start thinking about conservation, and conservation quality products. This means using products that are designed to last a long time without fading, warping, becoming mouldy, etc.

Let’s start with the surface.
There are any number of bargain shops these days that sell cheap pre-stretched canvases and canvas boards. These may be fine for exercises and practise, but most of them are not designed to last a long time.
The canvas is cheap and thin. The primer which coats it is usually not good quality, and also thin. The stretcher bars that support it can warp and twist over time.
It’s really important when looking to prepare your art to sell, that you find a good quality stretcher bar & canvas. The same applies for watercolour paper and similar surfaces.
Ask for conservation quality at your local arts supplies store.
Having said that, it is possible to paint on surfaces that are not designed to last. You’ll need a product similar to the Atelier Binder Medium to seal in any chemicals that may leach. These will eventually taint your painting.

Paint!
Use artists quality paint. Student paints are great for students. But the colours are not fast. This means that they will FADE over time. (Noooooooo! All that hard work - gone). Good quality artists’ colours shouldn’t. Nice and simple.
Sealing.
Most paintings (arguably all) will need a protective coat to, you guessed it, protect them. A layer of varnish over the top creates a barrier between your work and the dust and dirt in the air. A couple of coats will often even protect your work from scratches. Make sure though that you use a good quality product that won’t discolour and break down over time.

Sign & Date.
Some people recommend dating your painting. Others don’t. Some galleries don’t like clients to know how long the painting has been sitting in the gallery. Very important when you prepare art to sell - remember to sign your finished paintings. (I have sent quite a few into the world without signatures....whoooops!)
So the next thing you need to consider when you prepare art to sell, is:
The Back of Your Painting!
Finish the back of your painting professionally using purpose-built tape (ask your local picture framer). This is not just for looks - it’s also to prevent small creatures from making their homes between your canvas and stretcher bar.

Some framers seal the back of the stretcher bar entirely, preventing any creatures from getting anywhere near the back of the canvas. Not a bad idea.
You can write down the title of the piece on the back if you like - use pencil. I don’t like putting the price or the date on the painting anywhere - then you change your mind if you want! (actually, it’s more to do with my inherent laziness).
Prepare Art To Sell - Hanging
When you prepare art to sell, do not use cheap little brass lightweight d-rings on the back of your painting. And while you’re at it, do not attach cheap screw-in eyelets and wrap a bit of wire between the two.
If a customer is handing over their hard-earned cash, make sure it looks neat at the back, and that it will actually stay on the wall. Suggesting they may have a poltergeist is not generally an excuse that works.
Go to your local picture framer and buy purpose built d-rings. They will last a long time, and are robust enough to hold big paintings. I recommend buying d-rings that are much stronger than you actually need.

There is no hard and fast rule for hanging your paintings - except that it needs to be good quality, neat, and it stays where it is put! Many galleries have different preferences.
Check with your gallery or customer first before attaching your d-rings. In my opinion, it’s best to attach the d-rings directly to the hooks on the wall. No cord is needed for this method. And, it is stable - you won’t have to straighten it every time you walk past.
Prepare Art To Sell - Photography
You may wish to get a decent photo of your painting when you prepare art to sell.
Maybe just for your own records or promotion on the web, or to reproduce it for print media, like a giclee.
The world of printing has changed a lot, however one thing has remained the same. A good quality photograph will get you a good quality print. You may want to think about getting your artwork professionally photographed if you are thinking of going down this path.
 Bad Photo! |
 Good Photo! |
For your own records or promotion on the web, you generally don’t need a large file (less than 1mb is fine). This is growing all the time, (due to internet speed and data availability growing all the time), even last year the recommendation for the web was no larger than 200kb.
The main thing when photographing your work - try to get as much natural light as you can. And try to photograph squarely (or use a program to make adjustments).
Prepare Art To Sell - Value?
I’m entering this conversation tentatively. So many people have sooooo many opinions. My advice would be when preparing to sell your art, start reasonably cheaply (not so cheap that people don’t value the work), and test the market. You’ll find out whether you’re asking too much, or not enough.
In this way, and early in your career, selling a painting is no different from selling anything else. You have to meet the customers need, but also handle their concerns.
They may want to know all of the conservation stuff for example. They may also want to know that you’re committed to your work, and plan to be around for a while (investors for example, further down the track).
The most important thing however, is to connect potential clients emotionally to your painting.
Hone in on that. If they fall in love with the piece (and/or the idea of the piece, and your reasons for painting it) you are more than halfway there. Being enthusiastic about your work should never be underestimated.
The main thing? Be confident!
Fake it til you make it.
Prepare Art To Sell - How?
It’s handy to think outside the box here. Sometimes galleries are difficult to get into. In these days of huge digital exposure, they are arguably less important.
Possibly the first option to “test the waters” with your artwork is a facebook page. Post some pics, share with your friends, and see what happens! The really nice thing about this is if you do create a very compelling image, it can be shared all over the world. If this takes off for you, you can set up a shop or business page if you like.
There are also lots of online galleries you can register with and upload your work. Some take a commission or have a subscription fee to join, but many don’t! These sites are generally pretty easy to get around, and if you can attach an image to an email, you will handle setting up your own profile page. There’s one of them right here on this website you can try out!

If you look around your area, or local art magazines, you will find exhibitions and/or competitions to enter. You may be accepted (woohoo!), and even make a sale (bigger woohoo!). To a real life stranger! (WOO!!HOO!!!) At the very least, your work will be “out there”. Scary. But necessary.
Why not hold your own exhibition. Find a venue and possibly a couple of other artists. Pick a theme and hold a show! (We find alcohol helps sell paintings - but you didn’t read that here). It’s kind of stressful, and at the same time exhilarating. It’s also a great opportunity to get feedback on your work. (Be brave!).

Look for interesting high-traffic venues where people get to see your work in the best light. There may be hotels, or offices somewhere close at hand. Even your local library! Often businesses prefer to hang work for sale than purchase it outright from the artist.
There may be a local artisan market you can join. Set up a stall with your work, and spruik away.
It’s possible that in your home town there is a vacant shop. You could pool your resources with a couple of other artists, approach the landlord and for a small amount of rent establish a “pop-up” artspace. I’ve done that in my own home town. Check it out here if you like!
Hope this has given you some ideas on how to prepare art to sell.
Probably the best advice though, is to use some of that same creativity that you use to make paintings, and apply it to the process of getting them out there in the world.
Good luck!
Back To Acrylic Painting Tutorials
Back to Explore Acrylic Painting Home Page

Search This Site:

WTH is Acrylics Anonymous?
For more great painting tips, subscriber only specials and zingin' humour (hmmm, maybe?), subscribe to our monthly e-zine, Acrylics Anonymous. It’s fast, free, and we don’t send you junk. As a valued subscriber, you can purchase our 3 pack of downloadable how to paint with Mark Waller DVDs for only $80, or our downloadable V-log “Coral Reef - Underneath” for only $12.
See your subscription confirmation email for more details.
Subscribe here:
Recent Articles
-
Storm Coming
Mar 25, 24 09:41 PM
 I repainted over an old canvas. This painting just painted itself in under an hour. I didn't even have a fixed reference in mind - it just seemed to flow.
 -
Upcoming Workshops with Mark Waller
Mar 05, 24 11:09 PM
 Upcoming workshops & tutorials in your local areas, check here!
 -
Workshops past. Been & gone. Delve into past notes, info and stories.
Feb 26, 24 09:42 PM
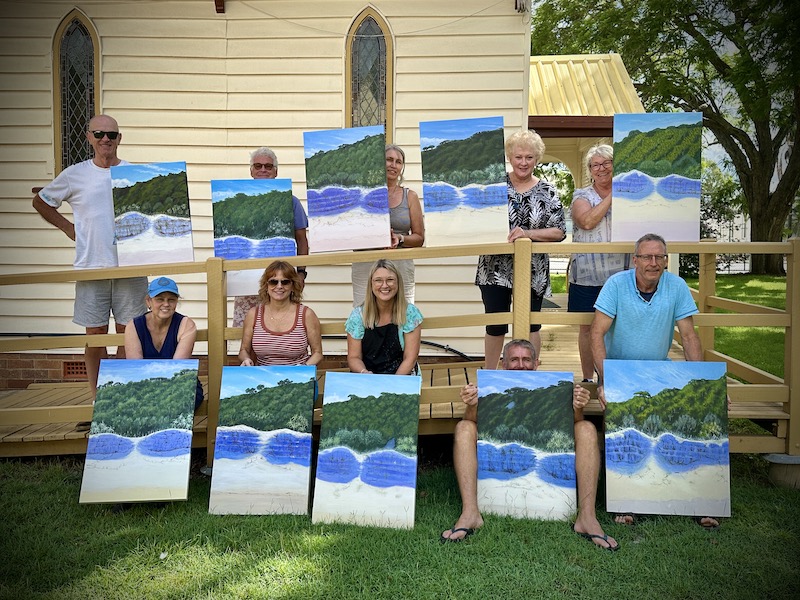 Mark Waller's workshops past - discover what was learned about, talked about, laughed about and consumed with gusto!
 Subscribe to this site!


![]()
About Us | Contact Us | Sitemap | Disclaimer | Privacy
Our Partners:
Copyright© 2007- All Rights Reserved
New! Comments
Have your say about what you just read! Leave me a comment in the box below.