
Compelling Ocean Landscapes. Vital Tips To Help You Paint The Magic.
Explore some simple tips and exercises to get you creating ocean landscapes with zing.

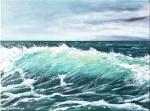
One of the keys to creating a good ocean landscape is in the very title of this page! Most of the rules that you can apply to your landscape paintings, will apply to a seascape - but with a few minor variations. We’ll go into them in a little more detail later.
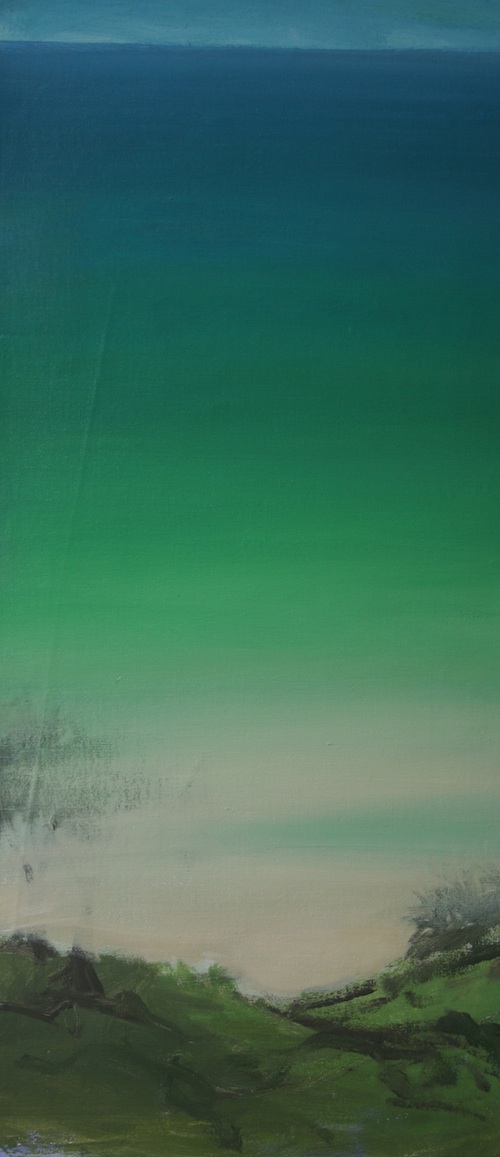
The biggest difference however, is the ocean part of the equation. Having a strategy for painting water is vital in creating convincing seascapes. When painting any landscape, the light is probably the defining factor when choosing colours.
This is even more important when you’re dealing with large bodies of water.
Whatever the light is:
sunset, sunrise, mid-morning, cloudy or stormy, will have a profound effect on your ocean.
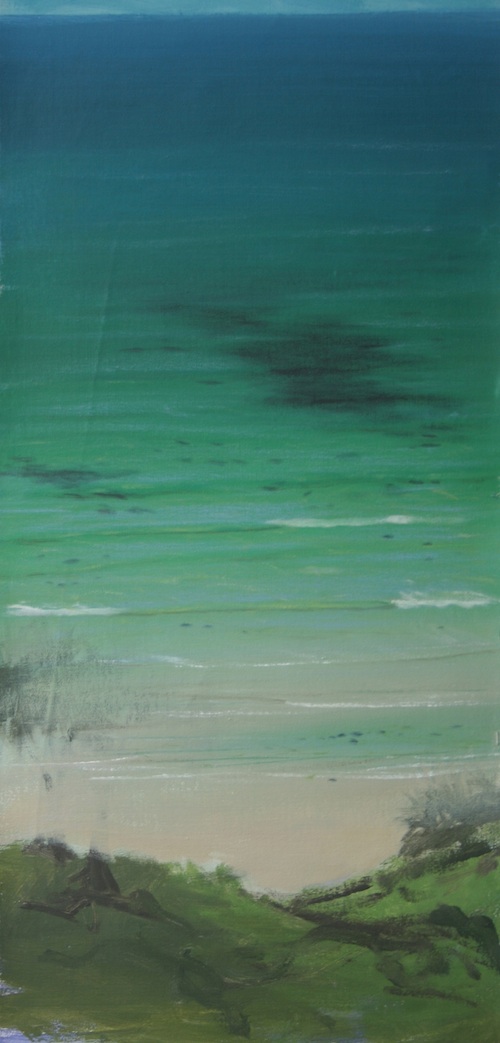
Water is highly reflective.
Whatever is happening in the sky will be reflected on the ocean.
Whatever’s happening on the surface of the water, will also determine how much of the sky is reflected. In other words, the smoother the surface of the water, the more likely you are to see more sky reflected.
Waves will create little windows which will reduce the amount of sky reflected.

Now to the similarities. These rules apply to landscape paintings as well as ocean landscapes:
Landforms in the distance will be more subdued as they recede into the distance.
The appearance of foliage will also be more subdued as it recedes into the distance.
An understanding of the shapes & patterns of foliage is very important.
While the same perspective rules still apply, they can be harder to find when looking at the ocean.
The sweep of a beach can sometimes be a particularly difficult shape to get right.
Close observation out in the real world is your friend. Not only will you get some fresh air, but you’ll be able to see the waves line up as they come into the beach, and you’ll see the shape of a sweep of a bay.
You’ll notice how waves move in relation to it.


This is possibly one of the biggest traps when painting ocean landscapes. Get these shapes wrong and your painting will crash and burn. It’s definitely worth drawing this shape half a dozen times with a pencil and paper before you throw paint at anything.
TIPS:
- Things in the distance appear less distinct, and the further away they are, the more their colour is altered. This is a great way to create the illusion of distance and depth. Make sure that the colour is altered in relation to the predominant light. Sunsets will affect the colour of objects in the distance in a different way than broad daylight.
- Whitewash is not white!! Being predominantly water, it is reflective and casts a shadow. If the light is pink, the whitewash will appear pink. Look at the shadows though, you will find some unexpected colours in the shadows (how to paint shadows page link). In sunsets, where the whitewash appears quite pink, you may find some blue-grey, or even slightly turquoise shadows hidden. The key always is close observation.

- Sand also is reflective especially where it’s wet.
An Exercise!
Here's how to paint a suggestion of reef or submerged rocks in your ocean landscape:
Step 1: Block in a large area representing your water/ocean.
Step 2: Now paint in some refraction. Click here for a refresher!

Step 3: Now to suggest a reef or submerged rocks. (Note: this is a rough guide, you will have to make colour adjustments depending on the light circumstances in your own painting).
Mix some Alizaren and Pthalo Blue, and with a dry brush paint in the reef/rock areas.
Step 4: Take some Burnt Umber and Cadmium Yellow Medium and create some refractive patterns on the reef.
Now paint the reflection of the sky with a very dry brush over the top. Voila.

Having a really good understanding of how to paint water is vital in making your ocean landscapes really stand out from the crowd.
My Water Fundamentals tutorial will help you understand the elements that make up the appearance of water, and change the way you look at water forever. Just a thought....
Search This Site:
WTH is Acrylics Anonymous?
For more great painting tips, subscriber only specials and zingin' humour (hmmm, maybe?), subscribe to our monthly e-zine, Acrylics Anonymous. It’s fast, free, and we don’t send you junk. As a valued subscriber, you can purchase our 3 pack of downloadable how to paint with Mark Waller DVDs for only $80, or our downloadable V-log “Coral Reef - Underneath” for only $12.
See your subscription confirmation email for more details.
Subscribe here:
Recent Articles
-
Storm Coming
Mar 25, 24 09:41 PM
 I repainted over an old canvas. This painting just painted itself in under an hour. I didn't even have a fixed reference in mind - it just seemed to flow.
 -
Upcoming Workshops with Mark Waller
Mar 05, 24 11:09 PM
 Upcoming workshops & tutorials in your local areas, check here!
 -
Workshops past. Been & gone. Delve into past notes, info and stories.
Feb 26, 24 09:42 PM
 Mark Waller's workshops past - discover what was learned about, talked about, laughed about and consumed with gusto!
 Subscribe to this site!


![]()
About Us | Contact Us | Sitemap | Disclaimer | Privacy
Our Partners:
Copyright© 2007- All Rights Reserved
New! Comments
Have your say about what you just read! Leave me a comment in the box below.