
Marbling. Faux Finish?
Or Foe Finish?
Befriend some simple marbling techniques to create wonderful faux effects and add to your painting repertoire.
Wrestled with Marbling? No need these days. In the past techniques for painting marble were predominantly done with oil based products. I believe that acrylics are actually far easier to use, without the smell and toxicity of oils.
With the new generation acrylics (like Atelier Interactive), blending has never been easier. Some slow medium or retarder will usually slow things down enough for you to move your paint around. Re-working, or re-opening paints with techniques like cissing becomes easier too. In fact, most of the techniques involved with using oils can be achieved with good quality acrylics. (Even with house paints in commercial situations).
The beautiful thing is that all these effects can be done literally within an hour or so of each other. Oils will see you sitting around reading bad magazines and snacking inappropriately for days waiting for paint to dry. As an added bonus, you can work over the top of acrylics with oil-based products (gloss and/or clear coats, for example). And a faster drying time means it’s easier to work on vertical surfaces.
Even if you’re not planning on trying to faux finish everything in your home, developing skills around these techniques is still a good idea.
Firstly, it trains you to use your brushes and paint in different ways. This develops greater versatility and confidence.
As a bonus, you can use some of these techniques to create marble in very literal way - to reproduce it for a background in a contemporary piece, for example. Or even paint the illusion of an old masters’ piece by creating marbled columns or benchtops in your paintings.
The best thing though, is that most of the techniques used for painting marble effects can be modified in some way to make your everyday paintings.
Let's look at some of these techniques in the following exercise:

Blending and softening:
This technique can be used for your backgrounds over a base coat. (Your base coat is a good solid coat of acrylic paint - if you wanted black marble it could be black, cream it could be cream etc.)
This coat is generally painted with a thin mobile paint - add a clear painting medium and a retarder to your mix to give you some time to soften and blend.
It’s applied liberally, spread around strategically, and eventually softened with a very soft dry brush.

Sometimes it’s nice to dab a clean, damp cloth (non-fluffy) over your canvas to create some “broken-ness” before softening.
This adds another dimension to your work. (If you want to use this technique somewhere else, this process can create a great dark, stormy uncontrolled sky).
Cissing:
Cissing involves “re-opening” the previous thin, softened layer.
If you work quickly, you can use water. (If you’re using Atelier Interactive, you can use the Unlocking Formula instead, which will give you heaps more time - hours in fact).

Load a large house painting brush with water (or Unlocking Formula), and flick drops across the surface. BEFORE doing this, flick the excess water out on the floor; or the cat, or your annoying neighbour. In other words, test the amount of liquid coming off first. It’s easier to add a little more water to the brush, than it is to take it off the surface. This technique is somewhat about “feel”.
Then let the water drops sit on the surface for a minute or two.
When the droplets are still wet, dab gently with a clean dry cloth. Where the droplets have been sitting, the paint will pull up, exposing the base coat, and leaving a lovely random stipple-ish pattern, and adding more dimension to your work.
Cissing is a wonderful technique to use in your paintings. You can create amazing abstract patterns. You can also create patinaed walls using this technique.

Veining:
For this technique you will need a little bit of retarder, but a lot more pigment than in your original thin coat.
It will also require some “controlled randomness” in the application. To help with this, grab an old, smallish, flat brush; and trim the blade bristles at roughly 45 degrees.
Doing this, then rolling your modified brush as you paint your veins in will help create that “controlled randomness” effect. In other words, you have a say in the main direction and shape of your veins, but will relinquish some control and allow the irregular shaped bristles to make their own way as you roll the brush. Does that make any sense?? Hope so.

The veins can then be softened with a large, soft dry brush. You can re-apply soft, thin coats and repeat the process if you want to. You can also “ciss” the veins.
Keep working until it looks right.
This veining technique can also be used to create branches in trees, refraction in water, grass tendrils on sand dunes, and myriad other things I’ve yet to discover.
Here’s a couple of tutorial videos from our ExploreAcrylics youtube channel you might also find useful.
Happy Painting!
Search This Site:


WTH is Acrylics Anonymous?
For more great painting tips, subscriber only specials and zingin' humour (hmmm, maybe?), subscribe to our monthly e-zine, Acrylics Anonymous. It’s fast, free, and we don’t send you junk. As a valued subscriber, you can purchase our 3 pack of downloadable how to paint with Mark Waller DVDs for only $80, or our downloadable V-log “Coral Reef - Underneath” for only $12.
See your subscription confirmation email for more details.
Subscribe here:
Recent Articles
-
Storm Coming
Mar 25, 24 09:41 PM
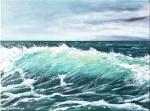 I repainted over an old canvas. This painting just painted itself in under an hour. I didn't even have a fixed reference in mind - it just seemed to flow.
 -
Upcoming Workshops with Mark Waller
Mar 05, 24 11:09 PM
 Upcoming workshops & tutorials in your local areas, check here!
 -
Workshops past. Been & gone. Delve into past notes, info and stories.
Feb 26, 24 09:42 PM
 Mark Waller's workshops past - discover what was learned about, talked about, laughed about and consumed with gusto!
 Subscribe to this site!


![]()
About Us | Contact Us | Sitemap | Disclaimer | Privacy
Our Partners:
Copyright© 2007- All Rights Reserved