
Landscape Painting.
A simple process to
help get you started.
Discover how landscape painting can be loads of fun,
AND good for your soul.
Early in art history, there was a fascination for painting landscapes. I think this is because of our fundamental connection with the environment. It's part of who we are.
It is even more important these days, when we are being pulled away from just "being" with nature. Time and responsibilities get in the way. Investigating the world to find a landscape to paint is not only fun, but also good for your soul.
Disclaimer: you will probably live longer - not my fault. Be warned.
When doing a landscape painting, the process I use is as follows: I should say this is my way, it's possibly not the "right" way, whatever that is.
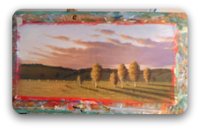
Choosing Your Image
I spend hours looking at the world, taking photos and making sketches. Choosing an image to paint is half the fun!
Get out there in the world and take some notes about what lights you up.
What lights you up is what you should paint.
The only advice I offer is that in the early stages, you should try to choose images that are reasonably simple. A complicated image will crush your will to live. (Or at the very least have you chucking a tanty. Um….hang on, maybe that's just me).
Roughing In
In this case, we have used Napthol Red Light as a ground. Start by blocking in darks. You may wish to consider blocking in your darks with an unexpected colour such as Dioxazine Purple.
If you're not comfortable with going straight to paint, you can mark your painting out in chalk first.

You can "warm up" or "cool down" a painting with the colours you use in your underpainting. Flashes of that colour will appear, making your landscape painting more lively and interesting.
The important thing though, is that you lay out your structure. Horizon here, trees there, hill over there, creepy toothless farmer behind shrubbery, etc.
This is a great way of "balancing" all of the elements at a very early stage, so changes can be made if necessary.

This leads us to composition. There are lots and lots of rules regarding composition. When you find out what they are, please let me know!
Seriously now, essentially they are using the elements so that there are no "empty" spots in the painting.
You can "balance" a painting by adding forms (structure) or movement (direction of objects for example).
As an example, a person looking towards the centre of the painting can lead your eye in that direction.

You can also use tone to balance a painting. I recently painted a large headland in a panoramic format. This large block of tone sat fairly heavily on the right hand side. I needed an element to counterbalance that. Rather than using darkness, I used a very bright sunrise to create interest and attention on the far left. Voila. Sorted.
Think a bit creatively about solving compositional problems. A very basic format for a balanced composition is this example of the "square rule", which involves placing your prominent or significant compositional object along a line that roughly breaks your painting into a square and a rectangle:

Ultimately though, rules are made to be broken. And breaking the rules can sometimes help you say what you want to say with more power.
Creating an "unbalanced" composition can make viewing a painting slightly uncomfortable. Handy, if that's your goal.
Once you've blocked in darks, it's often handy to work out your lights. In other words, find a large area of the palest colour, and block that in (for example the sky). This will give you your two tonal extremes.

After this point I block in all the "intermediate" colours such as highlights on trees, large grassy areas, blocking in rocks and working from dark to light.
There are several reasons for approaching your landscape painting in this way:
- It is a great opportunity to check the composition, and see if all of the structure, and the tones within the piece are balanced. It's not too late to move things around.
- Imagine you're firing a rifle. The first shot misses. But it's close - so you adjust your sights. Think of your landscape painting in the same way. The roughing in process is your first shot.
Every layer after this is adjusting. Acrylics on white canvas can often be quite transparent. A second coat is a good idea for building "strength" in your darks.
Never be afraid to build layers on top of one another. It will all add to the interest.
PS. Every time you paint, you improve your brush skills!
Intermediate Stage
At this point I re-establish the sky. Often the sky is a large area requiring some subtle shifts in hue and tone. For me, I want to focus purely on that and not worry about overpainting something. I get the sky as close to finished as possible, knowing that I'll probably have to touch up some parts later. Now we move on.
Because your darks are now quite solid, you have something to build on. Start looking at the "intermediate" colours and tones in relation to the darks. See if you can isolate the next dark colour (slightly lighter than the darkest dark).
As examples, look at the trees and see if you can find the next "lightest" colour. And paint it!

Apply the same principle to everything else within that "dark" tonal range, for example, grass, rocks, cows, creepy dudes, etc.
At this point you can still apply highlights. BUT. The approach is "tighter" than the roughing in process. In other words, you are putting gradually more detail into your landscape painting, allowing it to evolve in layers.
This will eventually give your painting much more life and dimension.
Now is the time to start really using the nuances of your paintbrush. The amount of pressure you apply, the amount of pigment you apply, and how deftly you use your brush - all of these things are becoming much more important.
Time to understand your paintbrushes people! The better you understand your paintbrush, the happier you will be with this stage of your landscape painting.
Final Stage
Now it's time to tidy up. This is where we apply the final subtle highlights to the edges of the trees, or possibly even add daubs of the sky colour (daubs: such a good word) into the trees to create the impression of gaps in the foliage.
This is where we tidy up any places that overlap. Trees over sky, tree trunks over grass, and finer leaves and branches in foliage.
This is also a great place to add flashes of colour by suggesting wildflowers, or even just spots of colour 'cause you can. Often, those little flashes are the thing that makes the landscape painting "pop". It would be very boring without them.

I like to coat my paintings with a coat of protective clear (I use Atelier Gloss Medium & Varnish - think they are changing the name to just Gloss Varnish ).
Some of you may prefer a matt look. That's also possible, and there are lots of products on the market. Whatever you use, just remember to use something. This will protect your wonderful landscape painting for generations to come. (Serves those grandchildren right!).
You'll develop your own process for creating your own great landscape painting. But two things are very important.
Develop your powers of observation:
Being able to find vital pieces of information will make finding good subjects much more fun. It will also make painting them more fun and much more satisfying.
Develop your brush skills:
All over this site there are lots of little tips and techniques that will help you do that. Or for our DVD tutorials click here!
Have fun exploring!
Ultimately, the more skills you have, the more freedom you have to chuck paint around, especially with landscape painting.

Search This Site:
WTH is Acrylics Anonymous?
For more great painting tips, subscriber only specials and zingin' humour (hmmm, maybe?), subscribe to our monthly e-zine, Acrylics Anonymous. It’s fast, free, and we don’t send you junk. As a valued subscriber, you can purchase our 3 pack of downloadable how to paint with Mark Waller DVDs for only $80, or our downloadable V-log “Coral Reef - Underneath” for only $12.
See your subscription confirmation email for more details.
Subscribe here:
Recent Articles
-
Storm Coming
Mar 25, 24 09:41 PM
 I repainted over an old canvas. This painting just painted itself in under an hour. I didn't even have a fixed reference in mind - it just seemed to flow.
 -
Upcoming Workshops with Mark Waller
Mar 05, 24 11:09 PM
 Upcoming workshops & tutorials in your local areas, check here!
 -
Workshops past. Been & gone. Delve into past notes, info and stories.
Feb 26, 24 09:42 PM
 Mark Waller's workshops past - discover what was learned about, talked about, laughed about and consumed with gusto!
 Subscribe to this site!


![]()
About Us | Contact Us | Sitemap | Disclaimer | Privacy
Our Partners:
Copyright© 2007- All Rights Reserved
New! Comments
Have your say about what you just read! Leave me a comment in the box below.